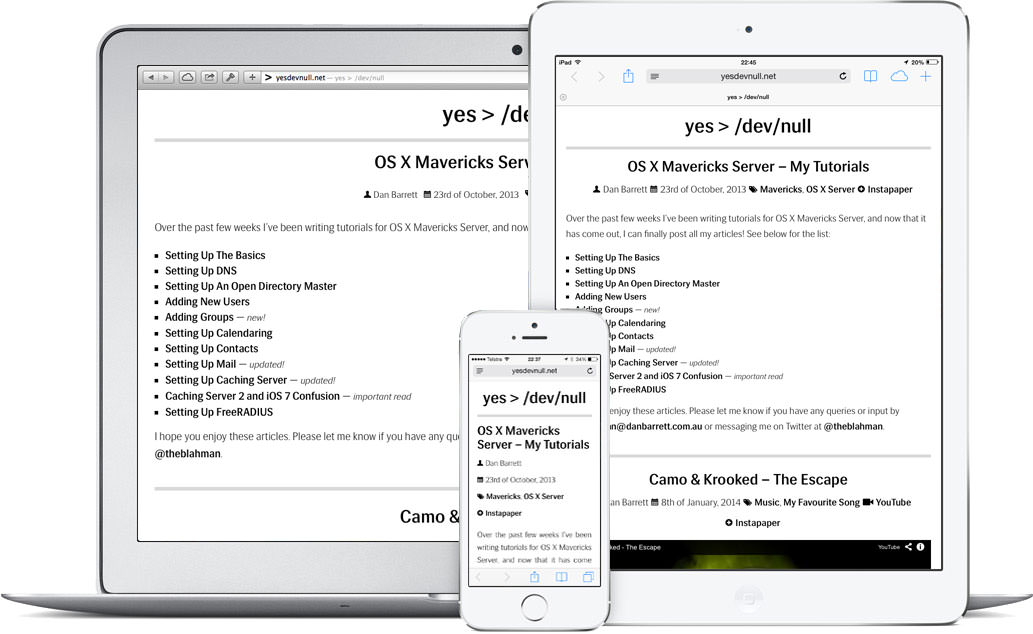
The website as it appears on a MacBook, iPhone and iPad.
Over the last month I’ve been thinking that my website was ermm… rather shocking on any screen that wasn’t a laptop screen. There was no support for phone or tablet displays, along with no support for retina/HiDPI displays that most smartphones are using these days.
I started off with rebuilding the template from scratch using a flexible and responsive Sass template framework called Gumby. This is my first experience using a CSS extension language and it was pretty fun to play around. I am now very much into mixins and includes.
Next, all site iconography (from Glyphicons) were converted to svg and then entered as code into CSS. I figured that it would be quicker to make big up the CSS file size a bit more than have a few extra HTTP requests for a few small images.
I’ve spent a while testing the site on a staging environment so hopefully it’s working ok for you readers! If you see any issues with the site, please let me know on Twitter at @yesdevnull.
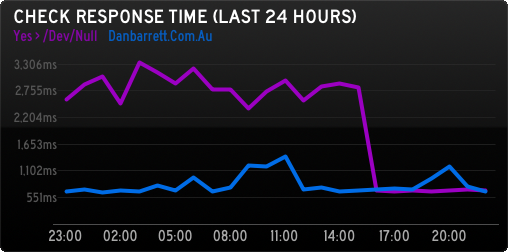
After making my firsttwo Status Board graphs I have been thinking of a third graph to make. Combined with my love for graphs, along with my love for making graphs, my third Status Board graph is a check response time graph for Pingdom.
Response times for yesdevnull.net and danbarrett.com.au over the last 24 hours.
I use Pingdom to monitor the response times of my servers (d’uh) and I thought I’d like to be able to see those results in a Status Board graph. You merely have to download the code from the GitHub repository, create the config.php file as per the README instructions and you’ll have a fully functional Status Board graph.
Currently my graph only supports results from the last 7 days, or the last 24 hours. I’m planning on adding more graphs soon, but currently, only these two graphs are super useful (in my opinion). In the config.php file I recommend that if you have less than 6 hosts in your account you can pass the ?autohost=true variable to the query string. Otherwise, if you have more than 6 the graph will probably look pretty messy with loads of lines everywhere.
Note: the graph bugs out a fair bit if, for example, you do a graph of last week but there’s only been less than a week worth of results you’ll see the graph looks a bit silly. It appears that Status Board doesn’t like graph keys that include a / or : (or I presume any other non-numerical characters).
Setting up a test environment can be a tricky thing when you compile PHP from scratch. As others have mentioned in the past, installations from Aptitude (and the like) lag behind which can quickly put your test environment out of date. Pulling inspiration from Juan Treminio and Brandon Savage, who both wrote excellent articles on setting up PHP from scratch. I like to keep my options open when developing which left both of those articles lacking a few features and extensions that I’d like to have bundled with PHP. At the time of writing this, the latest stable PHP version was 5.5.9 and the latest for Apache (through apt) was 2.2.22. Also, any version numbers mentioned in the article are the latest at the time of writing.
Contents
Debian Installation
Network Configuration
Apache Installation
Dependency Hell or: How I Learned to Stop Worrying and Love the Bomb
Download and Configure PHP 5.5
Configuring Extensions
Sources
At the end of this article, you’re going to have a PHP environment that looks like this. I’ve uploaded the output of phpinfo so that you can see what the extensions are, and how it’s all configured.
For the Virtual Machine (herein referred to as VM), I am using VMware Fusion 6.0.2. There are a plethora of different virtualisation programs out there but this tutorial will use VMware Fusion 6. There’s nothing too complex with the setup so it shouldn’t be very difficult for you to figure out the differences. I figure if you’re skilled enough to be rolling your own LAMP stack, you’re comfortable figuring out basic settings in a program.
Debian Installation
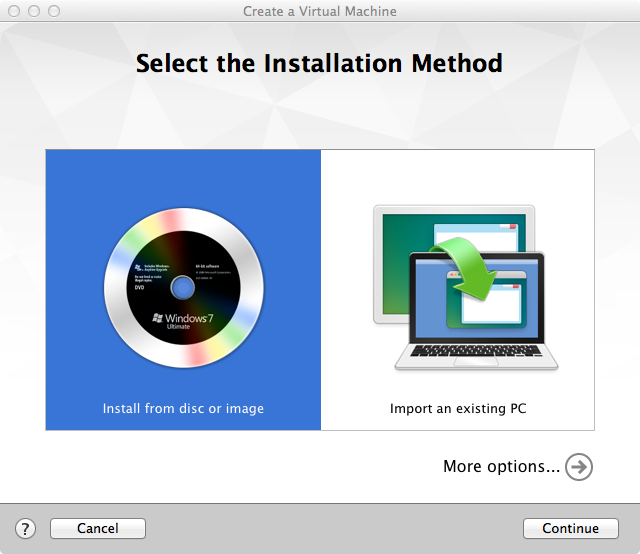
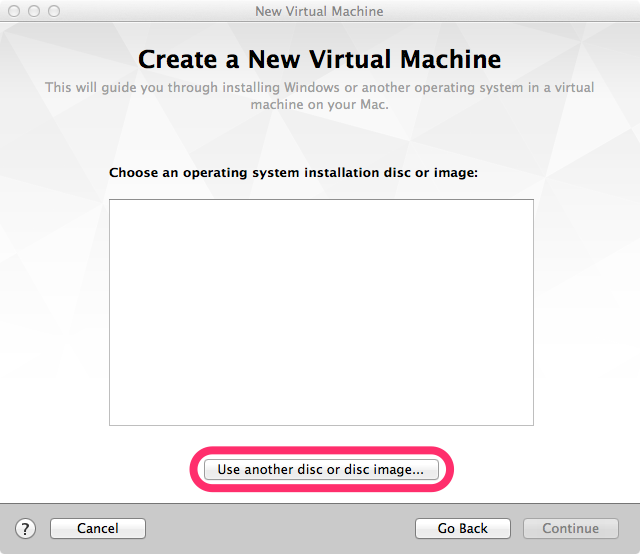
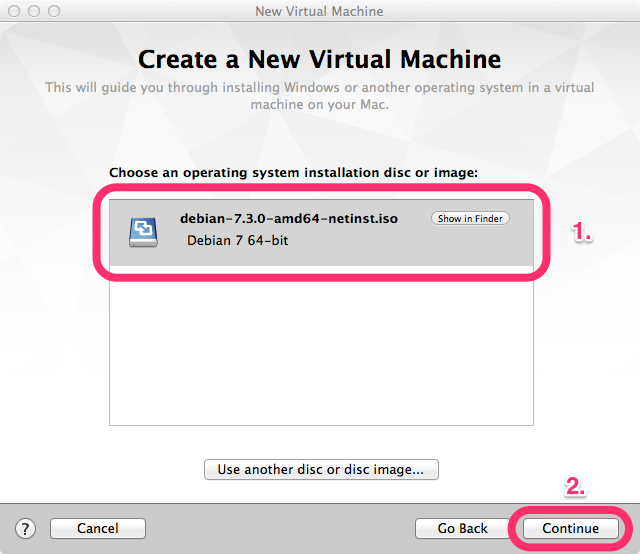
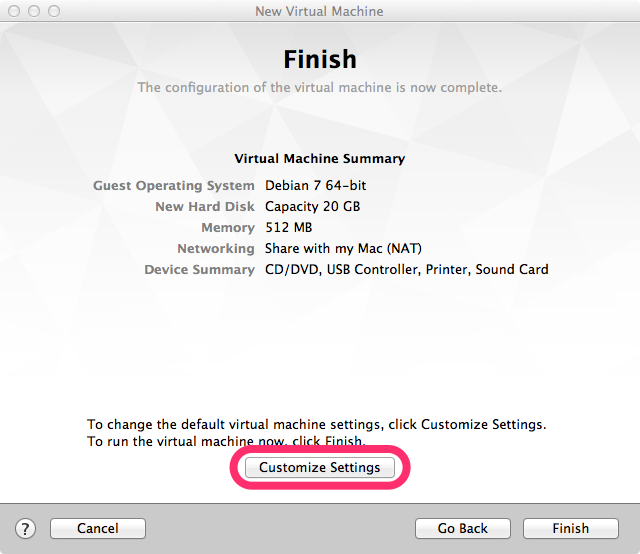
Alrighty, it’s time to set up Debian as a VM! Download Debian (64-bit) from the website, or click this link for Debian 7.3.0 64-bit net install image. Once that’s downloaded, open up VMware Fusion and create a new virtual machine (File -> New). Select “Install from disk or image”, then click the button for “Use another disc or disc image…”. Navigate to where your Debian install image downloaded to, then select it then click “Open”. Now click “Continue”. You’ll now be presented with a Finish window which shows you the basic configuration settings for the virtual machine. Instead of clicking “Finish”, click “Customize Settings”. Quickly select the location where you want to save your VM to then hit “Save”.
First Steps In VMware Fusion.
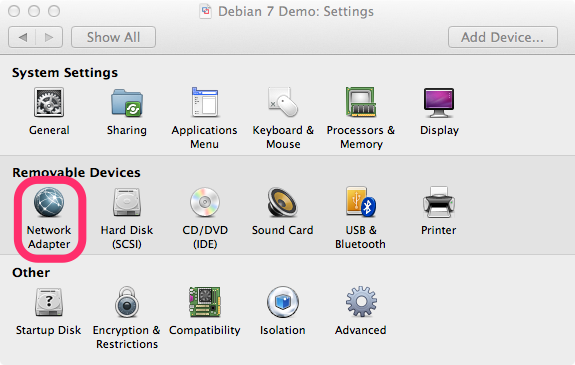
You’ll now be shown a window that looks a lot like System Preferences on OS X. Select the Network pane then change the network adapter type from “Share with my Mac” to “Autodetect” under Bridged Networking. This will enable your VM to have its own connection to your LAN but also use the highest priority network connection.
VMware Fusion’s Network Settings.
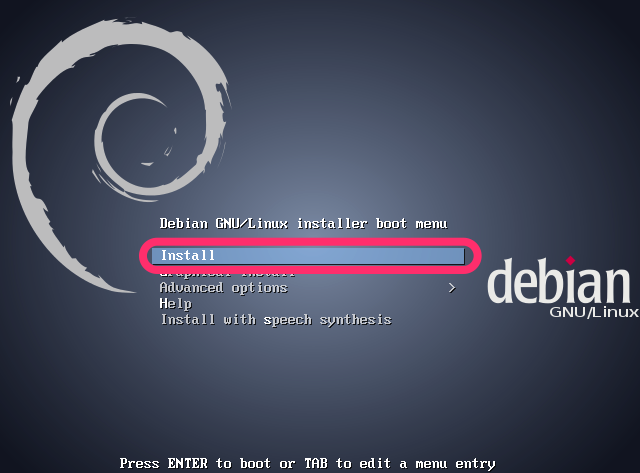
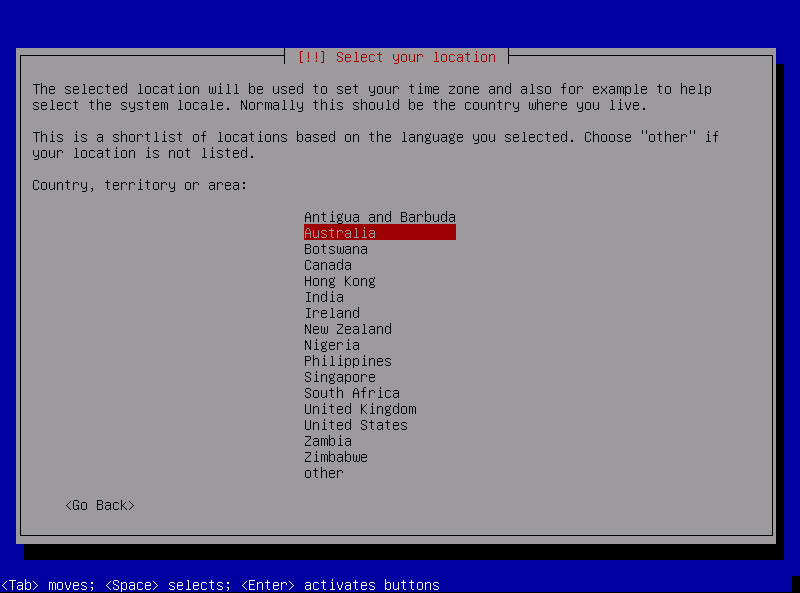
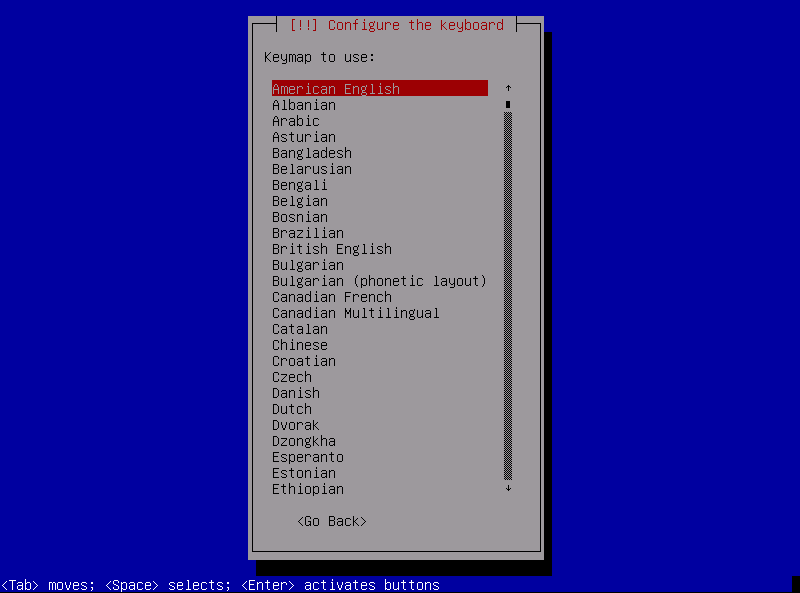
Now, close the Preferences window and hit the big shiney start button for your VM, it’s time to install Debian! VMware will take a few seconds before showing a pretty Debian installer window with a few options. Select the top option which is… “Install”. Pretty simple so far. Next up is selecting a language, I’m going to choose English because it’s my native tongue, and the only language I speak. Following on from the language is the country selection. While it’s not critical to have this correct, it will help to have your server have the same date and time as you so that log files and timestamps make sense. I’ll set my country as Australia, because that’s where I live. Next up is the keyboard map to use. Most keyboards will be American English but if yours is different, select it now.
Debian Installation - Language and Country Options.
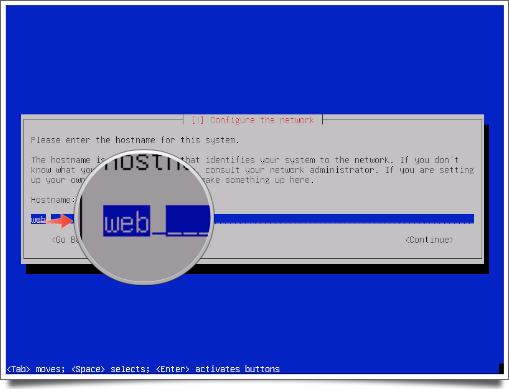
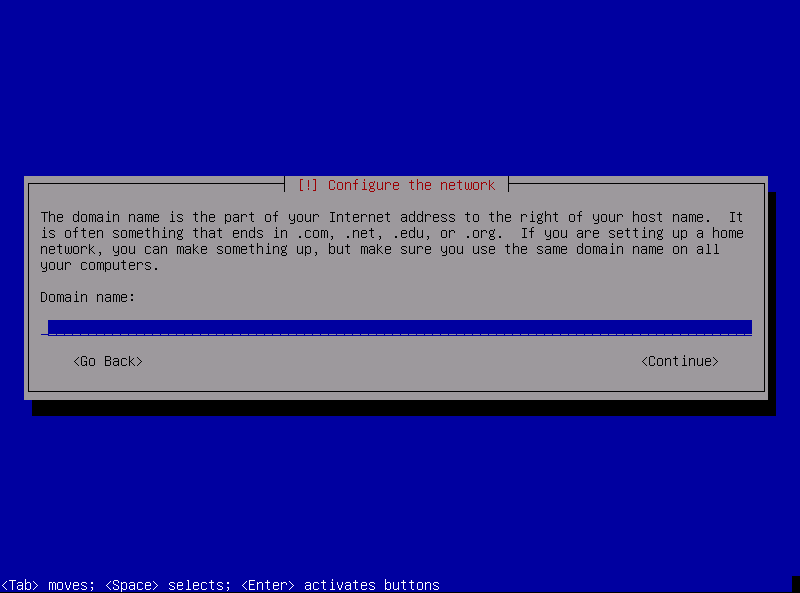
Ok, now we set up some basic network settings. First up is the hostname for the server. Normally, I would do web but I already have a machine called web running on my local network so I’m going to do test instead. Enter your hostname then go on to the next step. Now we do the domain name for the LAN. For example, I could enter yesdevnull.net if that were the domain name for my LAN. If you’re unsure on how to proceed, read the prompt that the Debian installer displays. Once you’ve entered the domain name, continue.
Debian Installation - Network Configuration.
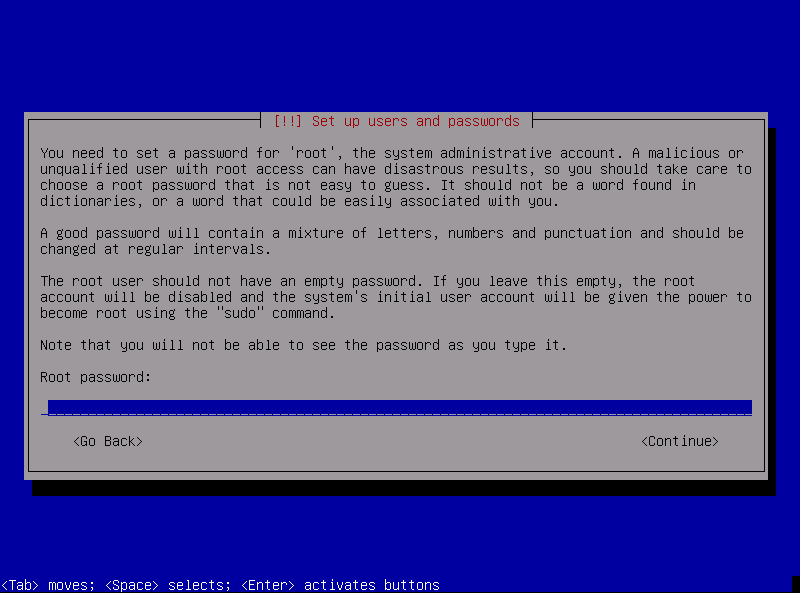
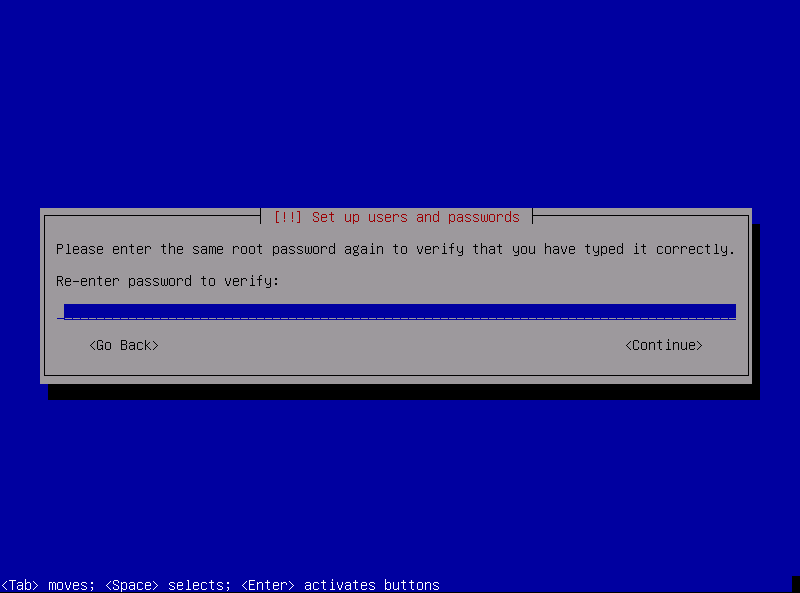
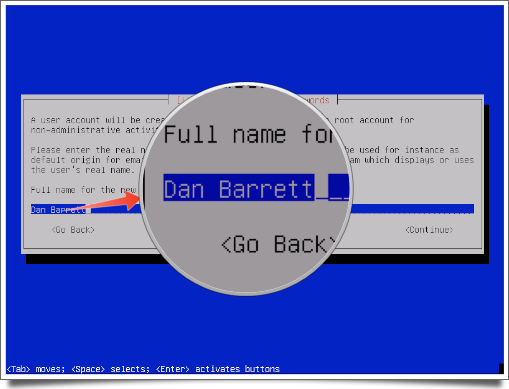
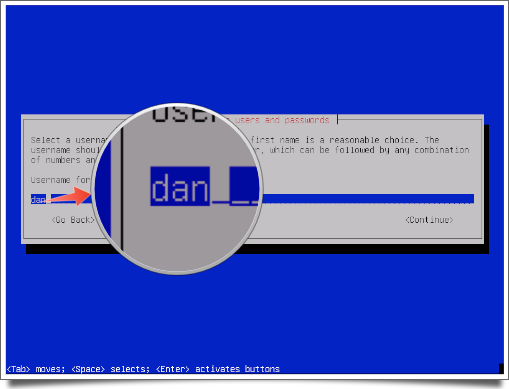
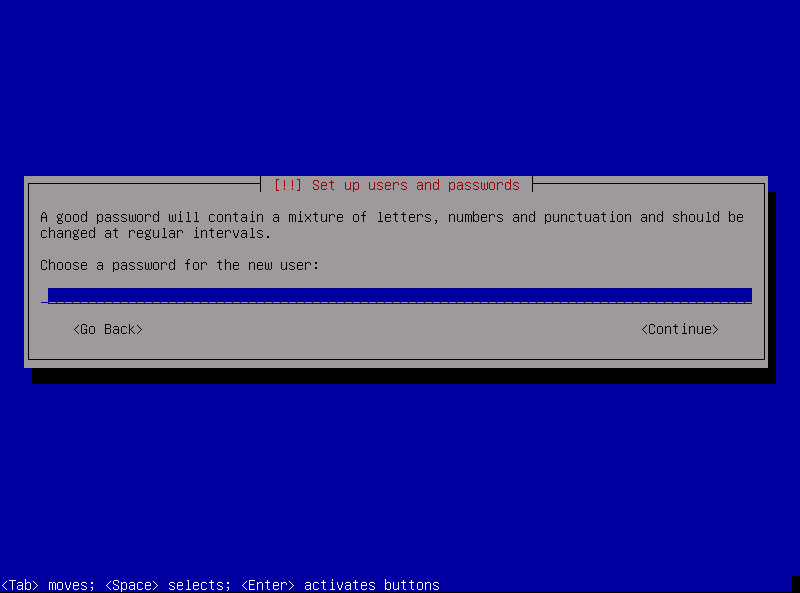
We’re now up to the root user password and first user creation. Your first step is to create a password for the root user. If this is purely going to be a VM that you use to test then you don’t necessarily have to create a mega password. I’d recommend something memorable and easy to type because you’ll have to type it a few times. If however, this is going to be a live machine, make it brutal. I recommend 1Password for creating nasty passwords. Continue on to the next pane where you’re going to enter that root user’s password one more time for confirmation. Once you’ve done that, hit continue. You’ll now need to set up a standard user account, typically your full name. I’m going to enter Dan Barrett because it’s my name. Next up is the shortname for that aforementioned user, I’m going to stick with dan for the shortname. Next I’ll enter a password for the user, then confirm the password on the next page. Personally I never use the non-administrator user account in my Debian boxes because I already know the admin password and trust myself to not enter any wrong commands.
Debian Installation - User Configuration.
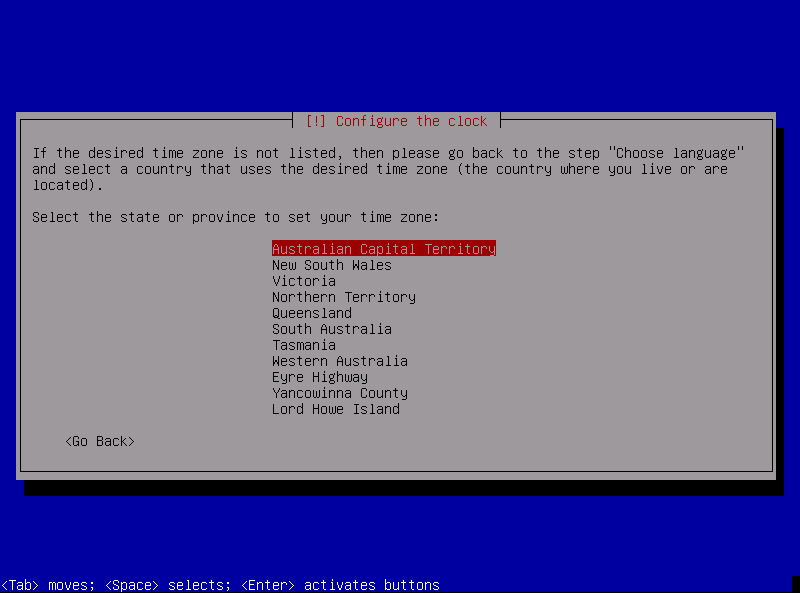
Hotdog! The next thing to configure is the time zone for the clock. The list you are presented with is based off the time zones for the country you selected earlier. In my example, I will select Victoria as it’s the state I live in (and has a different daylight savings schedule as other East-Coast Australian states).
Debian Installation - Clock Time Zone.
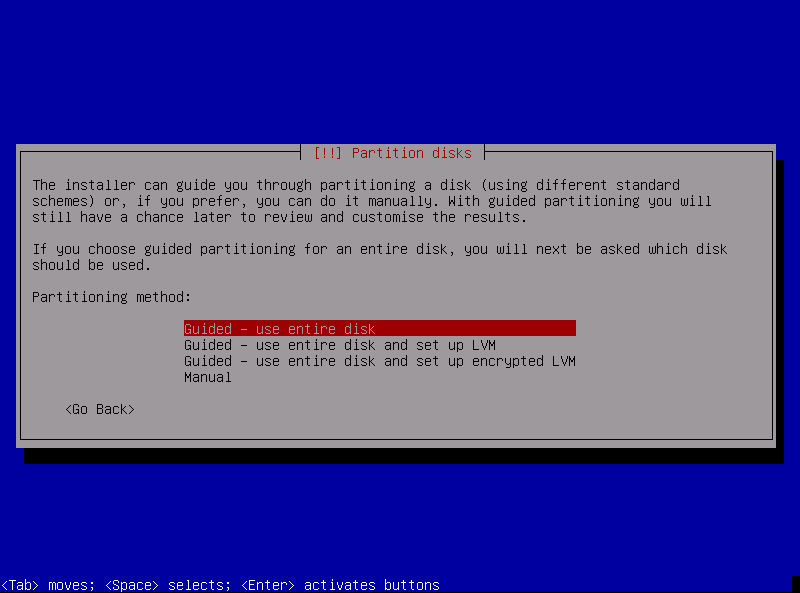
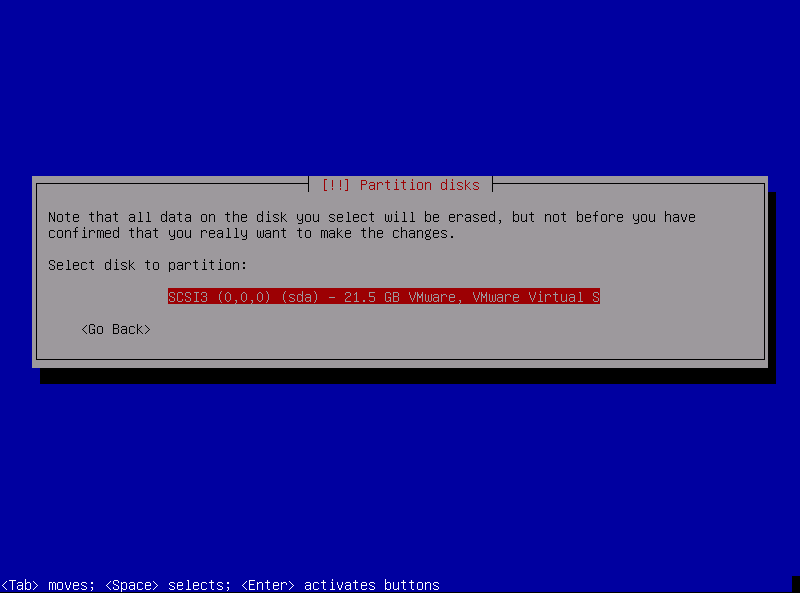
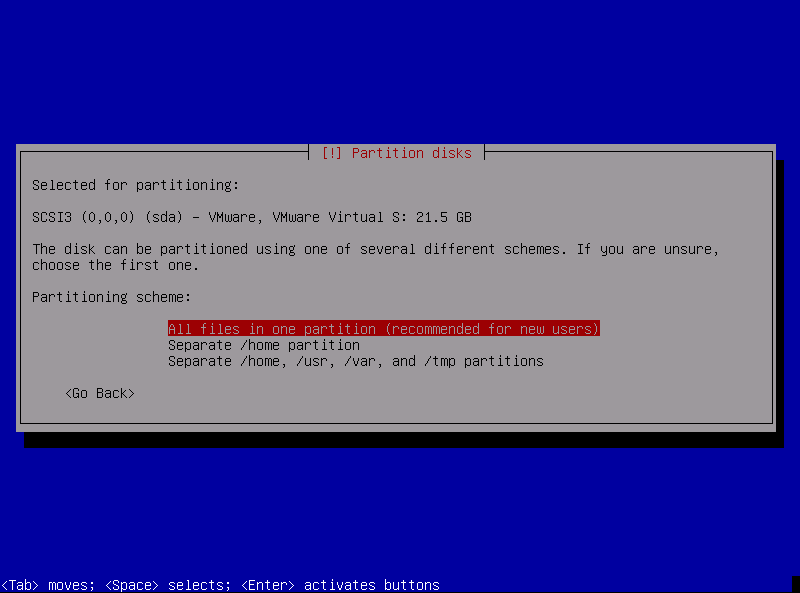
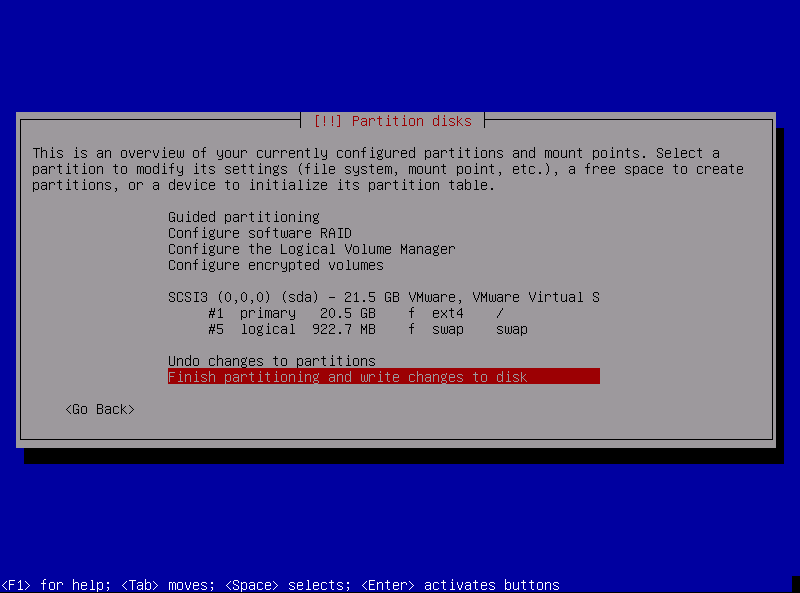
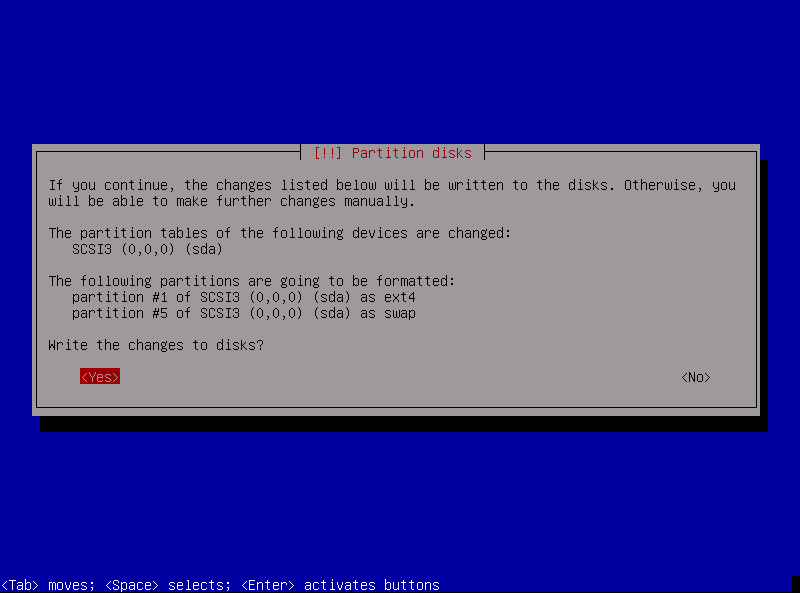
Ok, it’s now time to set up partition the hard disk and get it ready for the installation of Debian. For this installation, I’m going to select “Guided - use entire disk”. Given that this system will be on a VM, you shouldn’t have to use LVM, but if it’s something you want to set up, feel free to go down that route. The next step is to select the disk to partition. In VMware Fusion you’ll only have the one disk to format, so select it and continue. Next up is the partition scheme, and I’m going to select the basic “All files in one partition” as it’s not necessary for a test VM. You’ll now be presented with a partition overview which shows you all the details for the partition you’re about to perform. Continue on with “Finish partitioning and write changes to disk”. Finally, we’ll confirm these changes and format the disk. Move the cursor to “Yes” and continue. Give the installer a minute to perform the partition, and to install the base components of the OS.
Debian Installation - Disk Formatting.
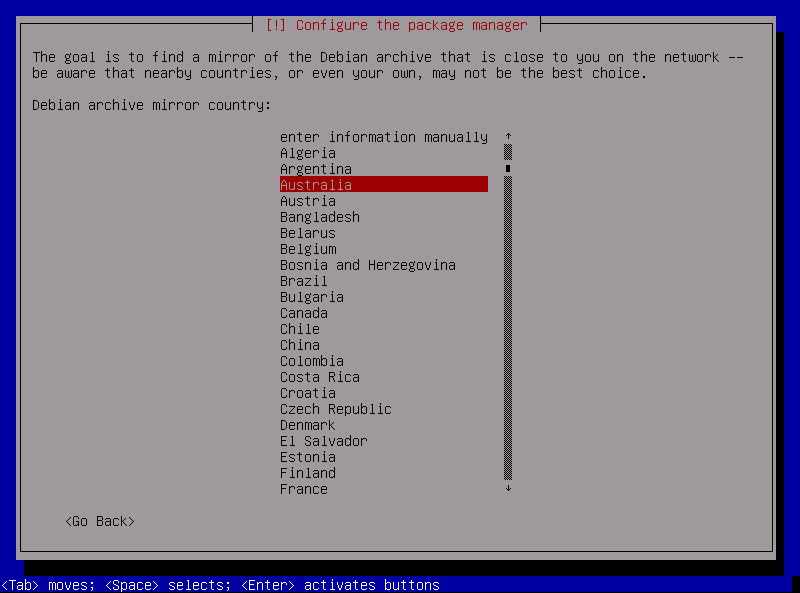
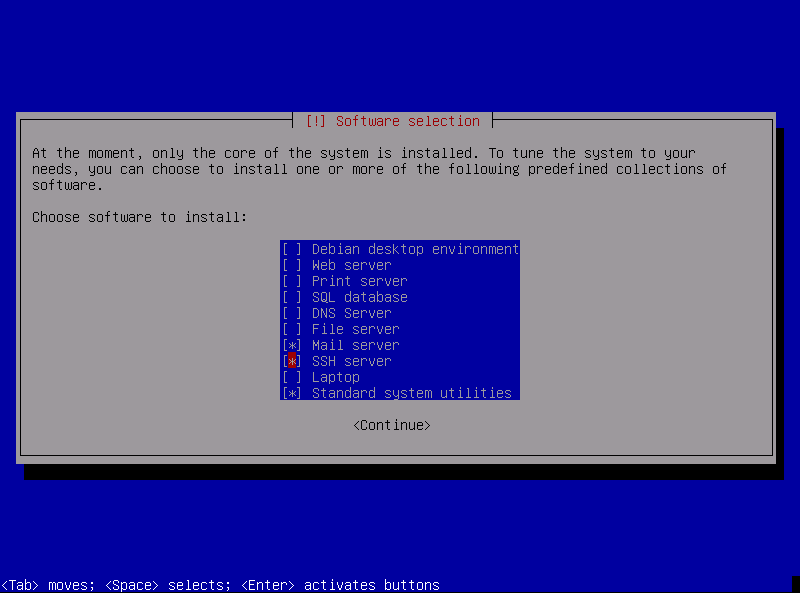
Once Debian has finished installing the basics, it’s going to ask you to select a package mirror that is relevant to your region. I’m going to select a mirror for Australia, then continue on to select Debian.org’s Australian mirror. Of course, you should select a mirror that is most relevant to your region. When asked for proxy details, enter any proxy details if you have any, otherwise press return to continue on. apt will now download a few files and prepare a basic package selection screen. Before package selection you’ll be asked about whether you want to participate in a popularity contest for packages. I say Yes because it’s nice to let the devs know what the most popular packages are. Now, you’ll be shown the package selection menu. Using the spacebar on your keyboard to select and unselect, mark the packages Mail server, SSH server, and Standard system utilities. Once you’ve got the three aforementioned package selections marked with a *, hit Continue to move forward. This should take a few minutes as apt downloads and installs the selected packages.
Debian Installation - Package Selection.
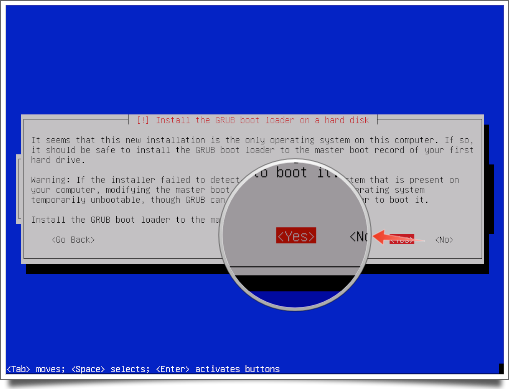
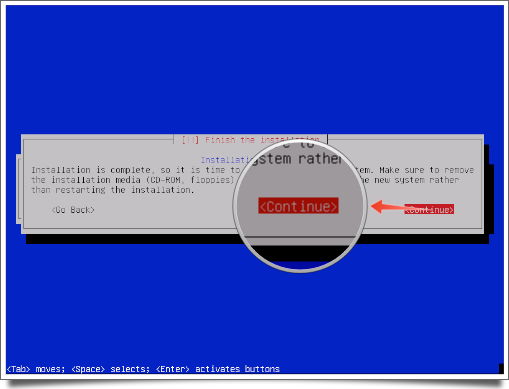
Finally, you’re going to be asked whether you’d like to install the GRUB boot loader for the hard disk. Because there’s no other OS in this VM, I would suggest installing GRUB. Keep the cursor on Yes, then press return to continue. Finally, your installation is complete! Hit Continue and the system will reboot.
Debian Installation - Final Steps.
Network Configuration
Before we get to installing Apache and PHP we need to set up a static IP address so the Debian VM has a fixed address on the LAN at all times. There’s nothing like trying to SSH into a box that has a floating DHCP lease only to find it’s no longer at that address. Log into your VM using the root user and password that you set up earlier. It’s finally time to start using the command line!
nano /etc/network/interfaces
Move your cursor down to the line iface eth0 inet dhcp and put a hash in front of it (#). Now, go to the line below and we’ll set up a static IP address for the system. The details I’m using below are only an example, and are 99% likely to be different to your configuration. You’re going to assign this VM a non-assigned IP address on the LAN that is able to be assigned as a static address. You’ll also need to know your netmask (typically 255.255.255.0) and the gateway (which is your router’s IP address). Here are my details:
Hit Control-X (^X) on your keyboard to stop editing, then hit Y to save the network configuration that we just entered. Now, it’s time to reboot the system so the Debian box will take our new network configuration. Enter the command below:
reboot
Wait for the VM to reboot and now we can SSH in! Open up your SSH client (Terminal on OS X) then type in the following command to SSH into the server:
ssh root@debian-ip
Make sure you replace debian-ip with the IP address of the Debian VM! For example, I would enter ssh root@10.1.125.220 to SSH in.
Apache Installation
It’s now time to get the Apache web server installed and configured. Assuming you’ve SSH’ed in (it’s much easier than having to type in the mega command coming soon), we’re going to install Apache and a few required libraries.
Enter Y to confirm installing the required and extra packages. You’ll be looking at downloading ~77MB of packages so give it a few minutes for apt to download and install the packages. Once the download and installation process has completed, we’ll enable Apache and make sure it’s running ok. Enter the following command to create the Apache configuration file:
nano /etc/apache2/httpd.conf
This will load up an empty file, and now we’ll enter in the ServerName. Enter in the following:
ServerName localhost
Load up the IP address of the Debian VM into a web browser and you should see the default Apache web page!
Apache - It Works!
We’ll also enter the following command to enable the very popular Apache module, mod_rewrite (see here for more details):
a2enmod rewrite
Finally, reboot Apache to enable the newly installed module:
service apache2 restart
We’re done doing the basic Apache configuration, it’s now time to move onto setting up PHP.
Dependency Hell or: How I Learned to Stop Worrying and Love the Bomb
Before we can download and install PHP we need to obtain a ton of packages that are required before we can compile PHP from source. We’ll start by installing MySQL and PostgreSQL:
This download should be about ~18MB in size, and should be pretty quick to download and install. One of the post-install triggers is to set a password for the MySQL server, make sure you remember it! Finally, build the dependencies for PHP (note that we don’t do an apt-get install for PHP because it’s out of date, and doesn’t have all the extensions and configuration options we want). Enter the following command to get the libraries required by PHP:
apt-get build-dep php5
You’ll be looking at downloading around ~63MB of files. Once it’s finished downloading and installing the dependancies, we’re going to manually download a few more files and compile them from source. First off we need to install the c-client library for IMAP support. Copy the link for the latest download here. cd into the home folder for the root user by typing this into a terminal window:
cd
That was easy huh. It’s now time to download that actual file, so using wget, we’ll download it! Check out the command below to download the latest version:
Give wget a few moments to connect to the FTP server before it downloads a 1.9MB archive. Now, extract it by doing this:
tar -xzvf imap-2007f.tar.gz
Before we do any compiling we’ll move the folder to /usr/local.
mv imap-2007f/ /usr/local
Now cd into the directory:
cd /usr/local/imap-2007f/
With this library, when using the make command we’ll need to specify the port name for the system. Given that we’re running Debian, we’ll be using the port name ldb, which stands for Linux Debian. We’ll also need to specify a special compiler flag -fPIC (for gcc) which is required for shared libraries. Finally, we’ll provide an EXTRAAUTHENTICATOR flag of gss to say that we want to compile with GSSAPI/Kerberos5 support. Bearing those facts in mind, lets make c-client!
make ldb EXTRACFLAGS=-fPIC EXTRAAUTHENTICATORS=gss
You must ensure that when compiling on Debian with gcc (which we are), you spell (or copy) the EXTRACFLAGS=-fPIC correctly. Failure to do so will mean PHP won’t be able to compile properly due to an error creating a shared object. Big thanks to Tan Hong Tat of brighterlamp for the tip. Once that’s done, we need to copy some c-client files into sub folders so PHP can read them properly.
mkdir -p {lib,include}
Now follow the next three commands to copy all the required files:
That’s the c-client extension for IMAP done. Now, over the past few years there’s been some debate about what the best image library for PHP is. gd has been around for a while and is included with PHP now, but it’s very limited in its file support. Most other people choose either ImageMagick or GraphicsMagick. Given that both are very powerful (and GraphicsMagick is a fork of ImageMagick, but significantly faster in some respects) I’m going to install both. Depending on your specific requirements, one library might be better than the other. We’ll now need to get another boatload of libraries so ImageMagick and GraphicsMagick have their dependencies all sorted.
apt-get install ghostscript libgif-dev libtiff4-dev libvpx-dev zip unzip
This could take a little while as you’ve got a lot of packages to download and install, and then you’ll also need to get dependencies for ImageMagick as we’re compiling it from scratch.
apt-get build-dep imagemagick
Before we can compile ImageMagick though we need to remove WebP (libwebp-dev) as it breaks when compiling ImageMagick, so we’ll have to download that and compile it from source. Type this in to get rid of it:
apt-get remove libwebp-dev libwebp2
Alright, that’s gone. If you have no idea what the heck WebP is, check out this page. cd back to the root user’s home folder then enter:
Wait while git downloads the source code, then cd into the folder:
cd libwebp/
We’re going to compile WebP with its additional libraries. Before we can play with the ./configure tool, we must generate it. To do that, enter this command:
./autogen.sh
This will create the necessary configure tool so we can compile the WebP library. As I mentioned earlier, we’re going to compile WebP with all its libraries, so enter the command below:
./configure --enable-everything
Once that has configured, run the make command to build WebP.
make
Once WebP has been compiled, we’ll install it. After all, there’s no point building a program if we’re not going to install it. Luckily, it’s pretty easy to install it.
make install
That’s it! WebP support is all done. Before you go and test it, you’ll need to reload the shared library (or dynamic linker) by running this command:
ldconfig /usr/local/lib
If you don’t run that, you’ll see an error like this: cwebp: error while loading shared libraries: libwebp.so.4: cannot open shared object file: No such file or directory or dwebp: error while loading shared libraries: libwebpdecoder.so.0: cannot open shared object file: No such file or directory. Running the aforementioned command will fix both of those issues.
Now it’s time to install ImageMagick! We have all the required dependencies so we can download it now. cd back to the home folder and use wget to download ImageMagick:
To compile ImageMagick we don’t need to specify any special configuration options so just do a normal configure.
./configure
Once it’s finished configuring, it’s time to compile.
make
Once that’s complete, do the install:
make install
And finally, like with WebP, refresh the dynamic library cache with ldconfig:
ldconfig /usr/local/lib
ImageMagick is installed! That wasn’t too hard now was it? We’ll just make sure it’s compiled and installed correctly by running a version check:
identify -version
And what we’re looking for is at the very top, which shows the version number and copyright information. For example, you should see something like this:
And once again (no prizes for guessing), we’re going to unarchive it.
tar -xzvf GraphicsMagick-LATEST.tar.gz
And now, cd into the directory:
cd GraphicsMagick-1.3.19/
Like ImageMagick, GraphicsMagick is pretty simple to compile. Using our friends configure, make and install we can get GraphicsMagick up and running in three commands, so let’s do that now.
./configure CFLAGS=-fPIC --enable-shared
Once the configuration has finished, we’re going to compile it.
make
And finally, install it:
make install
As per usual, reload those library caches just to make sure there’s no out of date cache files!
ldconfig /usr/local/lib
Finally, we can ensure GraphicsMagick has been installed correctly by running the following command:
gm -version
You’ll receive quite a lot of information, but the most important thing we want to see is at the very top (your output may vary slightly, but as long as you’re getting something similar, it’s all good):
GraphicsMagick 1.3.19 2013-12-31 Q8 http://www.GraphicsMagick.org/
Copyright (C) 2002-2013 GraphicsMagick Group.
Additional copyrights and licenses apply to this software.
See http://www.GraphicsMagick.org/www/Copyright.html for details.
Wow. What a journey. It doesn’t seem like we’ve accomplished much so far, but it’s all going to be worth it shortly. It’s finally time to download PHP!
Download and Configure PHP 5.5
Great, so (hopefully) you’ve followed all of the above steps and you’re now ready to install PHP, which is I’m sure the reason you started to read this article in the first place. Download PHP using wget like below (you can change the URL to a local mirror by copy and pasting the mirror link on PHP’s website):
Unarchive the file by doing the usual tar command:
tar -xzvf php-5.5.9.tar.gz
And now cd into the directory:
cd php-5.5.9/
It’s now time for a horribly large configure string. As I mentioned wayyyy back at the start of my article I like to have my options open, so I’ve got quite a few configuration options. Copy and paste this to configure PHP:
Run that configure script and give the system a few minutes to run through it all. PHP runs a ton of checks for compatibility during configuration so be patient. Once the configuration has completed and there are no errors (I like to scroll through the entire configuration output just to make sure there’s no glaring errors) we’ll move onto compiling!
make
It’s an easy command to type, but for the system, it has a lot of compiling to do. Start the make process then grab a cup of tea as it’s going to take several minutes. Once make has completed, it will suggest that you run make test. If you’ve got spare time, I highly suggest you run it (there’s over 12,000 tests with my configuration), but if you want a dev server ASAP, skip this step. It’s finally time to install PHP (but we’re far from done!).
make install
Ok! PHP is installed, but we’ll need to enable it in Apache before we can actually use it. Let’s create a symlink so the binary isn’t just stored in /usr/local/bin:
ln -s /usr/local/bin/php /usr/bin/php
Next, we’ll create a config file for Apache that tells it how to handle PHP files:
Before we test to make sure it’s all running happily, we need to create a ini configuration file for PHP. In the massive configure string earlier, we told PHP to look in /etc/php5 for a configuration file. So we’re going to copy across an example development php.ini from the PHP source. Before we can do that, we’ll make the folder!
mkdir /etc/php5
And now we’ll copy across that configuration file:
cp php.ini-development /etc/php5/php.ini
That code assumes you’re currently in the root of the PHP source that we downloaded earlier. If you’re not, cd into that folder and perform the command above. You’ll notice that we told PHP that it should use Zend OPcache and it was compiled with support for it, but we still have to explicitly enable it in the php.ini file. Using our best friend nano we’ll add that in now:
nano /etc/php5/php.ini
Now, using Ctrl+W (^W) type in opcache and hit enter. You’ll be taken to a section titled [opcache]. Create a line below and add the following:
zend_extension=opcache.so
Then using the arrows on your keyboard, enable both opcache.enable and opcache.enable_cli by changing the 0 to a 1 and removing the semicolon (;) from the front of those two lines.
It’s also recommended by the PHP documentation to change the following OPcache values:
It’s now time to check out our PHP info page to make it’s running happily, but we we’d like to get some details about the PHP runtime. We’re going to remove the default index.html file and replace it with a file that has the phpinfo function in it. Follow these steps:
cd /var/www
rm index.html
nano index.php
<?php phpinfo();
And hit Ctrl+X (^X) then Y to save the changes. Finally, we’re going to reboot Apache and bask in the glory of compiling PHP from scratch. Here’s the faithful command:
service apache2 restart
Give Apache a few seconds to reboot before opening up a browser and typing in the IP address of your Debian VM to see the PHP info page. Ta da!
Configuring Extensions
One extension that everyone should be using is a fantastic extension called Xdebug. It’s a profiler and debugger, and it provides significantly better debug information than just using var_dump. It’s pretty easy to install, we just need to download it and make it like we did with a few other extensions. Xdebug is stored on GitHub so you can check out the source there, or just copy and paste the command below to download the latest version:
git clone git://github.com/derickr/xdebug.git
Once it’s been downloaded, cd into the directory so we can compile it.
cd xdebug/
If you ls -la you’ll notice that there’s no configure script. That’s because before you can compile an extension for PHP, you need to run phpize so the extension can prepare for compiling with PHP. Simply do the following:
phpize
Now we need to configure it:
./configure --enable-xdebug
Now make it:
make
And finally, install it:
make install
Right, that’s Xdebug ready. Next, we’re going to install the libraries for PHP to talk to the image processors. In my past experience I’ve had issues with the GraphicsMagick linker from PECL so we’re going to compile it from source. Jump over to the gmagick PECL page and copy the link address for the newest download. cd into your home directory then download the extension using wget.
wget http://pecl.php.net/get/gmagick-1.1.6RC2.tgz
Once that downloads, do the usual and unarchive it:
tar -xzvf gmagick-1.1.6RC2.tgz
Okay, now cd into the directory:
cd gmagick-1.1.6RC2/
We’ll now phpize the extension so it can be compiled for PHP:
phpize
And now we can configure the extension:
./configure
Next, do the make:
make
And finally, the install:
make install
Next up is the ImageMagick extension, which we’ll also compile from source. Head over to the imagick page on PECL to grab the source code and make sure you’re cd’d to the home users directory.
wget http://pecl.php.net/get/imagick-3.2.0RC1.tgz
Then unarchive it with tar:
tar -xzvf imagick-3.2.0RC1.tgz
And now move into that directory:
cd imagick-3.2.0RC1/
Once again, we’ll phpize it:
phpize
Then run the configuration:
./configure
Then make it:
make
And install it:
make install
We’ve got some editing of the php.ini to do. Those graphics extensions we installed aren’t actually active in PHP, plus we have to configure a few other settings to ensure PHP runs smoothly. First up, setting the time zone. Take a look at the PHP page on supported timezones so you can add yours to PHP. PHP will complain if you don’t specifically set a timezone in its configuration files. Once you’ve got your time zone, we’ll use nano to edit the php.ini:
nano /etc/php5/php.ini
And now using Ctrl+W (^W), type in date.timezone and press return. This will go to the first mention of date.timezone in the php.ini. Change ;date.timezone = to your timezone. For example, my time zone code is Australia/Victoria so I would enter this:
date.timezone = Australia/Victoria
Note that I also removed the semicolon from the file (the semicolon is a comment in ini files). Next, because this is a development server, we want to see all the errors. Using nano’s search feature (^W), search for error_reporting. Hit Ctrl+W again (but leave it blank the second time) and press return again. The first instance of error_reporting is documentation, so we want to jump to the second instance. You should see error_reporting = E_ALL. Change this to the following:
error_reporting = -1
This means we want every single error, warning and notice there could ever be. By default, the PHP memory limit is 128MB. When I ran Zend Framework 2’s unit tests with a default installation it crashed within 10 seconds because it ran out of memory. It’s a very good idea to increase this from 128MB to 256MB so there’s a bit more room for code to execute. Search for memory_limit and change it to:
memory_limit = 256M
Next, we’ll want to add Xdebug and our graphics extensions that we prepared earlier. If we want to use both OPcache and Xdebug, we must ensure that the OPcache extension is loaded first, so we’re going to find the module in the PHP ini that is loaded just after OPcache (which should be curl, if it isn’t, search for OPcache and then load it after). Once again, do a search for [curl] and move the cursor just above the [curl] section. We’re going to enter a few lines of settings:
You’re done. Exit with Ctrl+X (^X) and save your work with Y then reboot Apache to see the changes:
service apache2 restart
Load up that PHP info page again and you’ll now see that Xdebug, Imagick and Gmagick are installed and ready to go. The absolute last thing we’re going to install (I promise!) is Composer.
curl -sS https://getcomposer.org/installer | php
Before you use Composer, we’ll do a rename on it so you don’t have to do php /path/to/composer.phar every time you want to use it.
mv composer.phar /usr/local/bin/composer
And that’s it. If you’ve followed this tutorial from the start then you’ve successfully set up a Debian LAMP stack where you can develop freely without worrying about accidentally destroying your live setup.
I’ve put in hours of work into this tutorial and tried to make sure that every link is right and every command is correct. If however, you spot an error, please let me know on twitter: @yesdevnull. If you have any other feedback, just let me know.
Enjoy!
Sources
This article would be nothing without the terrific work of the people below:
Finally, after many months of development and testing, my buddy Jedda has released his excellent backup script called Counterpart. The utility is written in Bash, and is a neat wrapper for rsync 3 to perform an easy backup of OS X.
While Time Machine backups are excellent, especially since OS X Server requires it to do proper backups, there’s nothing better than a bootable clone just in case your system goes down during crunch-time. There’s nothing worse than having a drive fail, only to find it’s going to be another few hours before your system will be live again. That’s where Counterpart comes in.
Recently I had someone contact me because they were looking for a script that would pull users from a CSV, and then import them into Open Directory on OS X Mavericks Server. Always up for a challenge I wrote a bash script to grab the users then send them to the Open Directory domain.
This script brings in the first name, surname, student ID and password from a CSV (the path can be specified in the only argument the script requires, which is the path to the CSV). The shortname is derived from the first name, surname and student ID. For example, Steve Miller with the Student ID of 654321 becomes sm654321.
To run the script, you would enter something like this:
./import_users.sh Users.csv
And, using the example Users.csv provided in the Gist (please bear in mind that the Gist automatically removes the trailing blank line, please add it before running the script), you would expect something like below:
2013-12-11 21:49:03: Added Joe Smith (js123456) to /LDAPv3/127.0.0.1.
2013-12-11 21:49:06: Added Bill Jones (bj987654) to /LDAPv3/127.0.0.1.
2013-12-11 21:49:09: Added Steve Miller (sm654321) to /LDAPv3/127.0.0.1.
For each user, the commands take between 3 to 4 seconds. That includes creating the user along with adding them to the groups. As noted in the bash script, you must ensure your CSV has Unix (CRLF) line endings, and a blank line at the end of the script. If it doesn’t have the correct line endings, it’ll fail completely. If you don’t have a blank line at the end, the last person in the list won’t be added.
Thankfully, adding this user through dscl creates the proper AuthenticationAuthority so the user is set up with Kerberos v5 and Apple Password Server. By default, the user will be added to the local groups com.apple.access_radius, com.apple.access_afp and com.apple.access_addressbook, and the network group workgroup.
Here’s a dump of a user created through this script:
dsAttrTypeNative:objectClass: person inetOrgPerson organizationalPerson posixAccount shadowAccount top extensibleObject apple-user
AltSecurityIdentities: Kerberos:sm654321@MAVERICKS.PRETENDCO.COM
AppleMetaNodeLocation: /LDAPv3/127.0.0.1
AppleMetaRecordName: uid=sm654321,cn=users,dc=mavericks,dc=pretendco,dc=com
AuthenticationAuthority:
 ;ApplePasswordServer;0xdb945916625111e39e62000c2928b48d,1024 65537 128972542829193592982355741981221062100920762016712038819623846465209128342622049783124389838185059988320142773235291480753225648977678597461748953848863734839600213928074142175413820927534135441280785829108224574601521657224863604777924988844508041132576614047193318182335513084715122081757952216834576233343 root@mavericks.pretendco.com:10.1.125.120
 ;Kerberosv5;;sm654321@MAVERICKS.PRETENDCO.COM;MAVERICKS.PRETENDCO.COM;
Comment:
 Student ID: 654321
EMailAddress: sm654321@pretendco.com
FirstName: Steve
GeneratedUID: FECF06E0-6654-4583-8471-B88AC4AC7D41
Keywords: students
LastName: Miller
NFSHomeDirectory: /dev/null
Password: ********
PrimaryGroupID: 20
RealName:
 Steve Miller
RecordName: sm654321
RecordType: dsRecTypeStandard:Users
UniqueID: 1052
UserShell: /usr/bin/false
Note: I’ve tested this script a fair bit, but don’t blame me if your Open Directory screws up! Always ensure you have a known-good backup before running a script you got off the internet. I’ve tried to get this script as perfect as possible, but there’s always bugs because not every environment is the same.