So I got punched in the face this morning. “Why?” you ask? Because I stepped in to prevent a fight.
Northbridge, the lively hub of Perth, has a bit of an assault problem (funnily enough, the brawl in that article was the exact same place as my incident). The combination of alcohol, drugs, and a culture that promotes fist fighting, in my opinion leads to this anti-social and violent behaviour.
I was on my way home from a work dinner (followed by some 90s pop hits) when two men decided to take it outside, as they say. Normally I wouldn’t be one to get involved in someone else’s fight, but when it occurred literally right next to me, I was unwittingly brought into the situation.
Because the elbow of the windup for the punch meant for the victim almost hit me, I grabbed the arm and started trying to talk him down when he decided to shut me up by punching me in the mouth. I guess it worked because I ended up with my butt on the ground (and with a pair of now broken headphones). I’m very lucky to have not hit my head on the pavement, or on the corner of a table just next to where the incident took place.
Thankfully there were other people around, and some police officers were only about a hundred metres up the road so they were able to quickly intervene and restrain the attacker. After giving my side of the story to the police and knowing that he was heading off to the local police station, I made my way home and called it a night.
Today I went to the doctor to get a checkup to ensure there was no bad damage done to me. Again, thankfully, nothing bad, just a swollen lip and a bit of a sore jaw. Nothing serious at all. But it could’ve been much worse.
Whenever an assault hits the news I often see that people ask for more police presence. In this case, there were uniformed police officers around a hundred metres up the road so how much more police presence does there need to be for it to become a deterrence? Have officers stationed every fifty metres? Doesn’t really sound that practical.
I’m far from an expert in preventing violence so I don’t have any good ideas or thoughts on how to combat anti-social behaviour. Gone are the days where the Good Samaritan can be safe when stepping in to help another person. It’s a shame, really.
Why am I posting this? Mainly because I’m annoyed and frustrated that these kind of incidents keep happening, week after week, day after day. Come on people, let’s be nice to each other. As George Costanza would say:
Note: I originally wrote this post for the Humaan blog.
Cookie Monster eating... cookies!
In case you’ve been living under a rock, LocalStorage is a JavaScript API
that allows you to store content in the browser’s cache and access it later on when you need it. Similar to how cookies work, but you’ve got much more than ~4KB (the maximum size for a cookie). That said, while there’s no size limit for each key/value pair in LocalStorage, you’re restricted to around 5-10 MB for each domain. I say 5-10 MB because as per usual, different browsers have different maximum limits. Classic!
Recently we’ve had the opportunity to use LocalStorage for our content. I quite liked it at first because it was very simple to use, but it wasn’t long before we ran into issues. Get this: LocalStorage stores content indefinitely, while SessionStorage stores content for the lifetime of the browser session… and there’s no middle ground. What if I want to store something for 30 minutes? Tough luck!
To make things more interesting, even though some browsers report that they have LocalStorage (I’m looking at you, Safari in Private Browsing mode!) you can’t actually use it (trying to write to/read from it will throw an exception).
Bearing these in mind, we decided to write a small custom library that gives you the ability to use expiries, fail-safe LocalStorage detection, and callbacks for when fetching data doesn’t run as expected.
Our most important method is supportsLocalStorage().
This method makes sure we can actually use LocalStorage, bypassing the likes of our aforementioned friend, Safari in Private Browsing mode. Here we wrap the LocalStorage set/get in a try/catch statement to catch any read/write exceptions.
Then, we call supportsLocalStorage() at the start of all the other methods to ensure we can actually use LocalStorage. If not, just abort any call early.
Now let’s look at the setter, setItem():
Not a particularly complex method when you think about it. The first two parameters are the key and value for the content you want to store. If you’re experienced with JavaScript (or any other language that uses the concept of keys and values with arrays/objects/hashes/etc) you’ll understand what they mean with no problems. The value can be anything that the core JSON
object can stringify.
The last parameter, expiry, is an optional numeric parameter that if supplied, is used as the lifespan of your key/value combination. When combined with our LocalStorage getter, we can use this expiry value to know whether we should bust the key/value next time we go to fetch it!
Be warned: there’s not a tremendous amount of validation ensuring legitimate numbers are used as an expiry – just provide an integer for the number of seconds you want your key/value combination remaining valid in the LocalStorage cache. It’s easy, you’ll be fine.
You’ll notice this method returns true without checking whether your item was actually set in LocalStorage. Unfortunately the API
itself doesn’t return a “save” response, so we have to assume the best and say that it did. But if this isn’t good enough, you can write a fetch method to confirm your suspicions. To me, that seems like overkill because the ideal time to check your item is when you’re actually fetching the data to use it. LocalStorage, like cookies, can be easily modified by the end user, so don’t assume that just because you saved it, it’ll be there the next time you go to pull it.
Our next very important method is our getter, getItem()!
This method is a little more complex. Obviously, the first parameter is the key name for the value you want to retrieve. The second value, however, is a callback you can provide to handle when a value doesn’t exist in LocalStorage. While a callback isn’t technically necessary, because LocalStorage calls aren’t asynchronous, I prefer using them as I feel it makes my code neater.
In your closure, your value in LocalStorage will be returned if it exists. Otherwise, if it doesn’t exist or if it has expired, you’ll get a null return value. This was the cleanest way I could come up with for handling both scenarios, which unfortunately does mean having to do an if/else statement in the closure to check whether the response is null or not.
Finally, our last method is a simple remover method.
The native LocalStorage method doesn’t return a status on whether the operation was successful or not, so I mimic the core method by returning void. Again, you could use a getter to ensure data has been removed, but I don’t really see a point in ensuring the core method has worked correctly.
Both of these examples use the expiry feature in the LocalStorage helper. If the devices key/value doesn’t exist in LocalStorage, we’ll fetch it via AJAX
and save it to LocalStorage for 1 hour (60 minutes), then either pass it off to another function or return it.
And there you have it! Check the Bitbucket snippet link for the latest updates as we continue to use and refine our LocalStorage helper.
Note: I wrote this article originally for the Humaan blog.
When Instagram added the ability to upload non-square media images to their service, the only way to get a cropped version of the image from the API was via the thumbnail attribute from the media endpoint. Those familiar with the API would know that Instagram’s thumbnails are served at a rather small size of 150×150 which is alright in some cases, but if you need a larger thumbnail size a 150×150 image scales up very poorly.
Here’s the images attribute in the API response for a recent Instagram post we did:
And here’s the thumbnail for that image:
Scaling that thumbnail up even 1.5 times makes it look very grainy and shows very little detail. For normal square images you can just use a different image size (like low_resolution or standard_resolution), but for images that aren’t square, you won’t get a nice square image. Not great if you’re trying to use a square grid to display Instagram pictures.
Now, here’s the images attribute in an API response for another recent Instagram post we did, except this time the image in question is landscaped:
Instagram are nice enough to provide a cropped, square version of the image for the thumbnail, but the low_resolution and standard_resolution URLs are both uncropped and are not square. Gross!
Say we want a 320×320 thumbnail of the Instagram post, but as you can see, we want a square image. If we use the low_resolution URI, we’ll get this:
If you take a look at the URIs for the images, you’ll notice that the thumbnail URI has an extra parameter in the filename path… the magical crop dimensions! Unfortunately, the crop dimensions aren’t accessible anywhere else in the API (as far as I know), except for in the thumbnail URI. With a bit of spelunking and messing around with the URI, you can change the s150x150 part of the URI to s200x200 for example to get a 200×200 sized thumbnail.
With that in mind, I’ve set the thumbnail URL to use 320×320 instead of 150×150 and voila! We have a larger, square version of the Instagram image:
Note that you can’t provide arbitrary dimensions and expect the API to automagically generate custom images sizes to your specification (Instagram isn’t an image processing CDN!). Change the dimensions to s220x220 and you’ll see what I mean.
If you run the above command you’ll see that the server returns a 404 “Unsupported Size” error in the headers but the body response is 5xx server error. Assuming the thumbnail size you wanted was a thumbnail size Instagram generated, you can semi-reliably use your custom dimensions, however I couldn’t guarantee that those thumbnail sizes will remain accessible forever. We’ve decided to bite the bullet and use 320×320 image dimensions where we can, so fingers crossed they don’t remove those dimensions!
If you’re crawling the API with a script, you can do something like this in PHP to alter the thumbnail (where $post is your Instagram post object):
This is a post I’ve been ruminating on and wanting to write for 6 years now. I will be talking about mental health, depression, suicide and the like. You’ve been warned! If you need help, do a search for your local mental health hotline and speak to someone that can help.
In the beginning…
Mental health has always played a part in my family history. Particularly on my fathers side. That and my predisposition for consuming large quantities of alcohol can make for the perfect storm and exacerbate ones mental health issues. I was diagnosed with severe depression sometime in September or October 2007 when my parents walked in on me setting up to hang myself (great look, I know).
Tears aside, first order of business was to see a psychiatrist. For the first several years of my treatment I wasn’t on any sort of medication. Each week, I’d see the psychiatrist and we’d work on getting through school and dealing with normal teenage kid problems. As an aside, the diagnosis of depression wasn’t linked to alcohol, in fact I didn’t start drinking until around 18-19 years old. There were also no drugs involved, I’ve heard the risks and links with marijuana and that’s why I’m still staunchly opposed to legalising it (legitimate medicinal usage aside). Anyway, back to the issue at hand. Through the sessions we figured out that I had been having feelings of depression as early as 2005 or so, but being a rather angsty teenager, neither my family or I would’ve guessed it was depression - it’s normal teenager stuff, right?
Up until early 2009 I was doing okay. I finished high school, got into the dream course that I’d wanted to study (Bachelor of Science - Professional Software Development) and I had a great group of friends and we still caught up regularly. I’d found school rather hard to deal with, I didn’t particularly apply myself and I had to deal with my fair share of bullying. I really only enjoyed it because my friends were there too. When school wrapped up forever and there was the three month-ish break between school and university I squandered my time and just faffed about doing bugger all (my exact memory is hazy, I don’t remember a lot of that time).
Finally, it was time to start university. Week one went down well. The core group of students were great, I got to know a few people, and we all hung out and socialised a fair bit. I think after the first week I realised what I’d gotten myself back into - it was the fucking pressure of education! I was thinking to myself “what a fucking wuss, everyone knows the first year of university is easy.” I was one week into uni and feeling just as stressed as I was in the last year of school.
At the start of the second week of university, it hit me like a slippery fish (that’s a GTA Vice City: VCPR reference). I was feeling like utter shit because I felt like I’d gotten in too deep. I felt like a failure because I was stressed about university and I couldn’t run away. My standard response for a shitty situation is flight (not literally flight, but to remove myself from the situation). My feeling was that literally running away from the university campus wasn’t going to help, so I should remove myself from the earth entirely. Again, that’s not literal, I didn’t have plans for a space death or space suicide.
That night, I attempted to hang myself again. This time, I’d kicked the chair away, thrashed around for a few seconds due to the immense pain, and somehow managed to get the chair back with my foot and saved myself from death. At the time I remember thinking that it hurt a lot more than I expected (I don’t know why I didn’t think it’d hurt that much, my pain tolerance is quite low; I have no idea how I’ve managed to get seven tattoos). After spending a few minutes sobbing and composing myself to essentially hand myself in to my parents as a “convicted suicide attempter” I went off and spoke to them about what had happened.
The next morning, we spoke to the psychiatrist and by that afternoon I was in the intensive care unit at a psychiatric hospital. To clear up any confusion, this ICU was essentially 24 hour suicide watch, not a standard hospital ICU where you’d be rushed if you were having a heart attack or something. This ICU was the closest I’ve ever been to feeling like I was in jail. Our whereabouts were monitored and checked off. We had twice daily inspections to make sure we didn’t have any contraband that could be used for self harm (or the harm of others I guess, but we were all more of a risk to ourselves than others). Every part of the unit (bathrooms included) had no way of hanging things (towels, ropes etc) and there were no sharp or hard edges anywhere. I realise writing this 7 years after being there that it sounds a lot worse that it actually was. The staff were very nice and very helpful, the facility was nice, and I got really good care.
I started taking medication for the first time while I was in ICU. After a week or two they started to kick in and I gradually started feeling better, along with the work that the carers and psychologists did in classes and sessions.
I spent exactly four weeks in the intensive care unit. Having your every move (or lack of movement) watched every minute of every day can really make you feel uncomfortable, but I came to like it. It means they care, right? (that’s not a dig at the staff or hospital, I am forever thankful that they dedicate their lives to help others). Once graduating from ICU, I got to move up (literally, to the second floor) in the hospital, to a less invasive ward known as Unit One. This section was more a “help yourself” section where there were a number of classes every day which you would be encouraged to attend. From memory, it was about you making the effort to help yourself, but if you didn’t go to classes for a few days, I’m pretty sure they’d start making you attend. I don’t know exactly, I never found that out, I really liked the classes.
In Unit One you would share a room with another roommate. My roommate was a man in his forties, also called Daniel, and he was extremely overweight. I found out that night he snored like a chainsaw. The next morning, partially from the lack of sleep and partially from the stress of Unit One life, I had a rather bad panic attack, had valium which didn’t help (and has given my hands a slight permanent shake to them, I’ve never been able to build card towers since) and got my ass shipped back to ICU because I wanted to kill myself again. After a few hours of being back in ICU, I had calmed down, my feelings had subsided and I was back with my friends and carers in ICU. From then on, I knew I had to work on myself more, because if I freaked out just moving wards in a hospital, I was never going to be able to live a normal life out in the real world.
After spending the next one to two weeks in ICU, I graduated from ICU and this time moved to Unit Two. While Unit Two was almost the same as Unit One, Unit Two just seemed to have a better vibe about it, and the people seemed nicer. I think the people in Unit Two were longer term people, were as Unit One people were short term, but I was never sure about that. This time, I got my own room, met some really nice people, and went to more classes to get better. Later on that week I had a session with my hospital psychiatrist’s assistant (I forget the exact word for it, the assistant was already trained in other mental health care, but they were becoming a fully fledged psychiatrist) and they did a technique on me which was essentially “negging” (but not in the sleazy seduction way), apparently it was to provoke a different way of thinking, and to make myself standup for what I am (or some such bullshit). Thankfully, as this was a privately run hospital, I was allowed to check myself out, and I went to live with my parents back home.
Over the coming weeks I attended a few outreach programs and continued working on building up my mental health with my psychiatrist.
Seven Years Later…
It’s been seven years since I went to hospital for my mental illness. I still take anti-depressants every day, just to stop my mood from fluctuating too much. I will probably be on them for the rest of my life. Over the past seven years my psychiatrist and I did two attempts at very slowly weening off them, but both times I started slipping back into the hole of depression. Despite taking medication to help stabilise my mood, I still have days where I wake up just feeling “off”. A trough in the sine wave that is life. Most days are the middle though, I never have the “peak” of a sine wave.
Despite having a number of very dark moments in my life, I’m very careful not to blame anyone, especially my parents or myself. Trying to change things in the past doesn’t work (for obvious reasons…) and it’s just a waste of effort. No one in my family, not even myself, could’ve seen the depression coming in so strong during a critical time during my life. Teenagers can be moody bastards at the best of times, so having down days just seemed normal. One of my biggest issues I had was ruminating on the past, and thinking of all the possibilities or things I could’ve done to change the outcome of an event. To a certain extent that can be helpful, but when it becomes something you obsessively do over and over for even the most minor of events (like seeing someone turn without using their indicator) then it becomes a problem, because there’s nothing you can do to change the past! I know, it sounds so obvious, but when your head isn’t in the right space, you don’t think logically.
Even during the darkest days of my current life I never think of suicide as an option. When I first heard suicide being described as selfish I got real mad. “How dare they! They have no idea what it’s like!” ran through my head. While it’s true that each person suffers in a different way it doesn’t detract from the action itself. I never once considered the ripple effect that would’ve gone through my family and friends. People questioning themselves, second guessing themselves if there was something they could’ve said or done, or if they’d said or done anything to push me over the edge. It’s selfish and cowardly. The easy way out. It’s a short term “solution” which existentially doesn’t solve your problem, and hurts everyone around you.
Mental Health in the Media
Now a days whenever there’s a mass shooting in the US, the media and politicians are quick to pounce on the mental health bandwagon and side skirt the real issue (a certain “right”). Just because I have a mental illness, doesn’t mean I want to pick up a gun and go around shooting people. That’s not to say that some form of mental illness isn’t a contributing factor, it is, but there’s not the only piece in the puzzle. There’s a lot more I could say about the main issue with mass shootings, but that’s not the point of this piece.
Mental Health in Society
Mental health is still made a mockery of in this day and age. While there’s more awareness of it, many people still don’t either care or lack the tact to talk about it in social situations.
If we’re told that we should accept who we are, why should we have to feel like we need to hide a part of us away from society for fear that we’ll be mocked and treated as an unstable looney who should be locked up. That might be stretching a bit, but I’ve met people who have had some extremely negative views of people with mental illness. It boggles the mind as to why some people think that just because someone has a mental illness it means they should essentially be incarcerated because they could be a menace to society. Needless to say, I don’t usually stick around those people long as they always seem to be like the people that are against gay marriage, evolution, or global warming - nothing you can say will ever change their mind.
Mental Health in the Workplace
Here in Perth, Western Australia, mining is a large part of our society, and yet, the mining companies are some of the worst offenders at supporting their employees with mental health issues. Being diagnosed with mental health issues and/or having to take medication for it is considered a liability so you’re deemed unsafe to operate pretty much anything aside from a computer at a desk. All because your brain may not be able to produce serotonin properly you’re now considered unsafe to use machinery because you could cause an accident. Which is kind of an odd way to think, because with the condition going untreated, they could potentially be much more dangerous. Point being, the way mining companies handle mental health issues is utterly disgraceful and everyone involved in making those decisions to cut someones career short because of mental illness should hang their heads in shame.
I, thankfully, have had very accepting and supportive workplaces who have all been fine with me ducking off for an hour here and there to visit my psychiatrist to help maintain my mental health. Wouldn’t you rather a happier employee that knew their employer had their back?
The Future
I continue to get through each day as normal. As I’ve mentioned, some days are rough, but for the most part I chug along fine. I’ve got a great family, I work with an amazing team, and I have fantastic friends. I’ve learnt that alcohol and I just don’t mix (it also doesn’t deal well with medication) so I’m jumping off the booze bandwagon and hoping into the sober sedan. Sure, I’m really going to really miss that feeling of cracking open an ice cold beer after a hard days work, but I know I’ll be better off in the long run without it.
If there was anything I’ve learnt through my years of dealing with a mental illness, it’s to build up your support network. Don’t be afraid to ask someone for help, or even if you can just open up and vent to them for five minutes. Don’t be afraid. We’re all loved.
Note: this article I wrote originally appeared on the Humaan blog.
Recently there have been some interesting discussions and posts about the use of incrementing IDs in websites and whether that’s accidental information leakage or not. An excellent article by Phil Sturgeon showed that you can learn a lot about how much a service is being used with just a few minutes of investigation. An incrementing identifier (or ID) is an integer that starts at 1, and is increased by 1 each time a new record is saved to the database. A UUID (or universally-unique identifier), on the other hand, is a 36 character long identifier made up of 32 alphanumeric characters with four hyphens in amongst it. Due to the length of a UUID it is much more difficult to guess UUIDs, let alone figure out how many users have registered on a site.
Note! The code in this article was written for Laravel 5.1 LTS
In the last few months we started working on a new project in the Humaan labs and the discussion of IDs versus UUIDs came up. This particular project was to be written in Laravel, and while Laravel uses auto-incrementing IDs as the unique key for a model, it’s easy enough to switch those out and use UUIDs instead. Having said that, we decided that we wanted to keep the auto-incrementing IDs for internal use but use UUIDs for user-accessible records (and by that I mean records where a URI would need to be generated like /post/uuid-here, for example).
So, I was tasked with implementing UUIDs for models in Laravel which, in itself, isn’t a difficult task. There were a few caveats however:
Not all models will have UUIDs so it can’t be on the base Model class
It must be reusable so adding or removing it from a Model doesn’t involve copying/removing a chunk of code each time
Users must never be able to generate their own UUIDs nor can they override them
However I implement UUIDs there must be a method that allows me to supply an auto-incrementing ID, or a UUID, which will return the requested record
Given that it must be reusable and can’t be on the base Model class in Laravel (and by that I mean the one in app/models, not the actual Eloquent class itself), I decided to go with a trait (truth be told I actually initially went with an abstract class but having to override the parent boot method just didn’t seem right). While there’s no defined place to store traits in Laravel I created a folder in the app/ directory called Traits. The name of our trait is UuidModel so, naturally, the file name is UuidModel.php.
When working with UUIDs in PHP there’s no point trying to roll your own solution to create and validate UUIDs. Time and time again developers have been caught out implementing their own half-baked solutions (hello rot13 or base64 as “hashing” or “encryption”), so we’re going to use a well-known PHP library that will generate the UUIDs for us. Open up your terminal and enter in composer require ramsey/uuid and press enter. Alternatively you can put "ramsey/uuid": "^2.8" in your composer.json file and run composer install. Once that library has installed, we’re ready to go!
Pretty basic so far – just a namespace, use statement, and the trait itself. If you look at the source for the base Eloquent Model class (for reference: Illuminate\Database\Eloquent\Model) you’ll see there’s a method pretty early on in the piece called bootTraits. This is called by the booter and looks for any traits on the model that have a static method starting in boot. This means that rather than having to do a nasty like this:
protectedstaticfunctionboot()
{
parent::boot();
// our stuff here
}
And perhaps forgetting to call parent::boot(); in a sub class (and thus causing Eloquent to implode) we can safely separate out our boot logic without interfering with the rest of the boot process. On a side note, if there’s one BIG tip I can give anyone working with Laravel it’s to check out the source code. You’ll find so many handy methods that will make your life much easier (and quicker too). Anyway, now that we’ve figured out we can add to the booting process, we’re going to make our booter and then attach some event listeners to the model so we can watch for specific events.
The boot method for the trait must be the same as the trait name with boot prepended. So, UuidModel becomes bootUuidModel, [PickleCat](http://dn.ht/picklecat/) becomes bootPickleCat, you get the idea. Check out the method class_basename in the Illuminate\Support\helpers.php file to see what it looks for. As mentioned before, the method must be static so don’t forget that keyword otherwise your booter will never run.
First off, we want to ensure that users can’t be sneaky and assign their own UUIDs (this is assuming your FormRequests, controllers, models, and what not prevent user input from setting the UUID) we’ll need to watch the creating event. This alone is perfect for preventing user input from wiping out your UUID but also saves you having to add another line to each instance where you create a model with UUIDs and generate it. What it doesn’t count for, however, is updates to the model. Thankfully, there’s an event for saving updates to a model so we can bind to that too. Let’s get started, shall we?
As mentioned in the Laravel Eloquent documentation, you can use a Service Provider to listen in on Eloquent events, or you can just use the late static binding static keyword to reference the current class in runtime! Simply put, the line static::creating will be called when that event is fired on the current model.
We’ll use a anonymous function as the creating event callback and supply the current model as a parameter with the name $model. Assign the attribute uuid with our UUID that we generate by calling the uuid4() method, and getting its value as a string (without the toString() method, the UUID is actually an array with 6 values). Pretty simple really. The creating event fires just before the model is persisted to the database, so unless you have a trait that boots after, your assigned UUID won’t be overwritten. If you’re curious on where this event is in the workflow check out the method performInsert on the aforementioned Eloquent model class.
Once again in this boot method we’ll bind to event but this time we’ll bind to the saving event. This one is a little more complete, mainly because we have to verify that the UUID hasn’t been altered in some way (whether that be maliciously, or accidental – although that’d never happen, we both know programmers never make mistakes). Whenever you’re interacting with an Eloquent model, you’ll notice that there’s an attributes property along with an original property. If you were to make a modification to the Eloquent model during the application lifecycle the changed value is stored in the attributes property. Using this information, we can safely check to see if the UUID stored in attributes is identical to the UUID in original.
Using the handy Eloquent method getOriginal, we can obtain the original UUID value and compare it. If the UUID has been changed somehow, revert it back. If the UUID hasn’t changed, we do nothing. This alone will give you UUIDs for a model in Laravel, but what if you want a reliable way to search for a particular model without having to write Query Builder statements every time? Look no further, I have the solution below.
As you may recall, Eloquent models have the fantastic ability that allow you to generate custom Query Builder queries on the model that can be reused time and time again. If you’re not familiar with these “scope” queries take a look at the “Query Scopes” section in the Eloquent documentation. I’ve defined two queries that we can use – one called scopeUuid, which receives and searches for a UUID only, and another query called scopeIdOrUuid, which can take either an ID or a UUID, and find the associated record. In both my scoped queries, I’m going to add an extra parameter so I can either return the model directly or return the Query Builder instance. This is more of a convenience thing rather than anything else – I find I’m usually just fetching a model straight rather than using the Query Builder, but adding it in means I can have the best of both worlds.
On to scopeUuid:
As with our magic booter method, all methods starting with scope are magically called by the Eloquent Query Builder class. Our first parameter is a required one that all scopes must include. It’s the Query Builder query so you can access the Query Builder, and return it to chain queries. Next up in our parameters is the UUID, enough said. Thirdly, the boolean parameter to determine whether we return the found model, or the Query Builder instance. This defaults to true as a convenience – it works well for me but feel free to change or remove it if you find it not to your taste.
First up in our method is a bit of a doozy – first we need to check to see if the supplied UUID is a string and secondly we need to make sure it’s a valid UUID. The is_string (line 14) check, while defeated easily, is necessary to ensure we don’t pass an object, array, etc off to preg_match and cause a fatal runtime error – that ain’t catchable! The regular expression you see above is designed specifically to match UUIDv4 strings. Certain parts of the UUID string start with specific letters so we do a check to make sure that we don’t have a v1 UUID, for example.
If for some reason the above regex doesn’t work for you, use ^[0-9A-Fa-f]{8}-[0-9A-Fa-f]{4}-[0-9A-Fa-f]{4}-[0-9A-Fa-f]{4}-[0-9A-Fa-f]{12}$ instead, which is from the above UUID library. This regex will verify that a string matches any type of UUID, regardless of version.
If either one of the if statement checks fails, we throw a ModelNotFoundException exception so the developer can reliably catch it. Next up, we simply chain a where method call (line 18), which essentially means WHERE uuid = $uuid (Eloquent actually uses parameters with SQL, but this statement is purely an example of what the query would look like – never ever ever send user data blindly into an SQL query).
Lastly, in our little scope that could, we do a check to see if the $first parameter is set to true or false (line 20). If it’s true, return the firstOrFail method that executes the $search query or return the Query Builder instance so we can keep on chaining. There we are! Our scopeUuid method is done, now it’s on to the scopeIdOrUuid method.
This method is rather similar (the only parameter that’s different is $id_or_uuid – pretty self explanatory really) so I’ll just breeze over it quickly. First, we’ll do a check to ensure it’s either a string, or numeric (whether that be 1 or '1' – line 14), and throw ModelNotFoundException if it isn’t. Next, use regular expressions to determine whether the $id_or_uuid variable is an integer or a UUID (line 18). If it doesn’t, throw a ModelNotFoundException exception.
Next up is a nifty feature of the where method in Query Builder. Did you know where can actually be a callback, you can nest WHERE queries in one bigger WHERE query so that you don’t accidentally break your tightly scoped query with a misplaced WHERE. We’ll use an anonymous function for our callback and use the use language construct so that our anonymous function can inherit the $id_or_uuid variable from the parent scope (line 22).
Once again, a final check to see if the developer wants the model (or catch a ModelNotFoundException) or the Query Builder instance returned to them (line 27).
And there we are! Now you can go out and use it! Oh wait, no you can’t. Unless you’ve already generated UUID fields your models won’t be able to store their UUIDs! Whip up a migration using php artisan make:migration _migration_name_here and let’s add UUIDs to the tables. For each table that needs a UUID, add this to your schema:
$table->string('uuid', 36)->unique();
If you’ve installed doctrine/dbal and are using MySQL, you can also append ->after(‘id’) to the above command so it appears after the ID in your SQL table.
To use this handy trait, use it in a model like so:
Simple as that! It’s also recommended that you add the ID to the hidden attributes property so the ID is removed from the array/JSON representation of the model. Add the following to all your models using the UUID trait:
/**
* The attributes that should be hidden in array/JSON representations of the model.
*
* @var array
*/protected $hidden = [
'id' ];
When it comes to actually using the trait in your application you can use it like any other Eloquent or Query Builder method. An example of this could be a route like so:
There we are folks, an easy way to implement UUIDs on your Eloquent models in Laravel. If anything should change in the future I’ll do my best to update the article as the changes come.
Note: this article I wrote originally appeared on the Humaan blog.
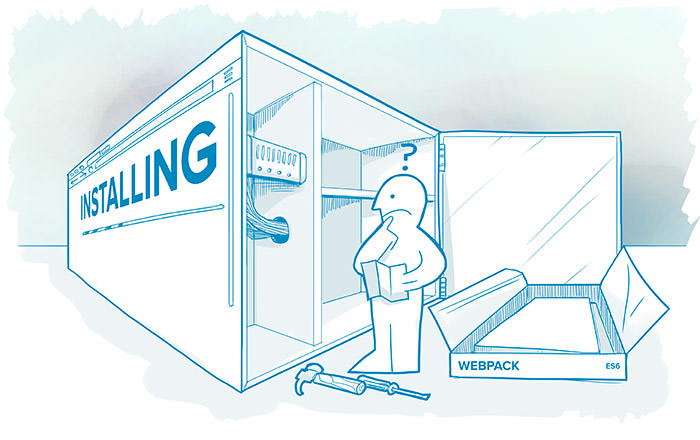
We’re working on a little side project here at Humaan, and I thought it would be the perfect opportunity to try out some new-ish frameworks and build tools. For a while now, React and webpack have been all the rage, and I wanted to learn more about them. I’ve previously dabbled in React, but it was a while ago and many things have changed since then.
This article assumes you have some knowledge of JavaScript, the command line, and have Node.js installed on your system. If you have Node.js installed but haven’t used it for a while, I highly recommend updating it to the latest version.
New beginnings
With ECMAScript 6 (aka ES6 or ECMAScript 2015, hereto referred to as ES6 in this article) becoming a thing, I thought I’d also give Babel a try too. For a few months now I’ve wanted to ditch jQuery from my stack, and start writing native JavaScript. The reason for this is that ES6 has a number of new features that means it’s easier to write vanilla JavaScript, and not have to include a ~30 KB jQuery file for each site. jQuery had been a necessity for many years, especially for normalising interaction between different browsers, but as many browsers vendors are (for the most part), following the proper conventions, there’s less need for jQuery nowadays.
If you’re not familiar with webpack, it’s a similar build tool to Grunt or Gulp, but it’s also a module loader like RequireJS. While you can technically use webpack with Grunt/Gulp/etc, I’ve found I haven’t had any need to. webpack can do everything Grunt or Gulp does, and more! webpack is designed with large sites in mind so the idea is to write your JavaScript as a modularised code base so you can re-use and share code, with the goal of making it easier to maintain projects over time.
A brief summary of the stuff we’re going to use
webpack: build tool that uses plugins and loaders to manipulate your code
React: a JavaScript library that is very powerful and allows you to build large applications with data that changes over time
ES6: new standard for the JavaScript language (think CSS3 or HTML5)
Babel: transpiles modern ES6 JavaScript to older ES5 syntax for older browsers to understand
Sass: Amazingly powerful CSS extension language that we’re already using on all our sites
A significant part of the development stack was set up by following a great article by Jonathan Petitcolas How-to setup Webpack on an ES6 React Application with SASS? There were a few gotchas in the article, and I also wanted to write my React classes in ES6, so while Jonathan’s article was great to get set up with, it left me with a thirst of wanting to find more about ES6 and React.
In this article we’ll set up webpack to handle our CSS, images, and JavaScript. I’ll touch a little bit on React, and we’ll make a basic React app that’ll say “Hello, <name>!” and will update automatically using the very cool hot module loader. Our React app will also be written in ES6 syntax which will be transpiled to ES5 syntax by Babel.
Getting the basics set up
To get started, create a new folder on your computer, and create a package.json file then chuck the following into it:
Next, open up your command-line application of choice, and change your present working directory to the folder you created earlier. We’ve created our list of packages required, so now we need to install them by entering the following command: npm install. Give it a few minutes while all the packages are downloaded and installed to your local filesystem. Once that’s done, create a HTML file called index.html and enter the following:
As you can see, there’s absolutely nothing to the HTML page, except for the script tag referencing a currently non-existent JavaScript file.
Would the real webpack config file please stand up
Now, let’s create our webpack configuration file! In the same folder, create a JavaScript file called webpack.config.js and enter the following:
As there’s a heap of stuff going on in this configuration file, let’s go through it line by line.
entry: getEntrySources(['./src/js/entry.js'])
This line tells the built JavaScript file all the possible entry points into the website, and which files should be loaded accordingly. If you’re going to split your JavaScript files out and only load them on certain pages, this is more important, otherwise loading all JavaScript into one bigger file will be fine.
The output option tells webpack what the name of the compiled JavaScript should be called (and where it should be saved), and you’ll notice it’s the same path as I specified in the HTML. Public path isn’t necessary if you’re loading the file via the filesystem (a la file://), but if you’re serving the site through a web server, chances are this’ll be necessary (in the case of this demo, it’s necessary).
devtool: 'eval'
The devtool option determines how the sourcemap should be generated. Depending on which tool you use to generate sourcemaps, this value can be different, but for us it’s just eval.
Next up is the module option, but as there’s two parts to it, preLoaders and loaders, I’ll do them separately. preLoaders are used on code before it’s transformed, for example, for code hinting tools, or sourcemap tools. loaders are used for modifying the code, and then you can even have postLoaders to handle things like tests over the generated code. For further information regarding loaders and their order, I recommend checking out the loader documentation page.
Using the preLoaders option, we can tell webpack which loaders we want applied to specified files. In our case, I want to generate sourcemaps on the JavaScript files, so we tell webpack that. The test option determines which file(s) to be used, and can be written a number of different ways - as you can see, I’m using RegExp to find all file names ending in .js or .jsx. I’m also excluding the node_modules and bower_components folders as they can be full of hundreds if not thousands of matching files, and I don’t want to include them unless I manually import/require them. Finally, I tell webpack which loader I want to use with the matching files, which is the source-map-loader.
Our first loader can look pretty confusing at first, but it’s pretty simple really: we’re looking for all .scss files nested within the folder “src”. Next up, we have an array of loaders that tell webpack which loaders we want to use, the order of those loaders, and the configuration options to pass on to the libraries themselves. I find that when using a number of loaders, it’s cleaner to use the loaders array, rather than a loader string delimited by exclamation marks.
When specifying loaders using an array, the loader order is from the bottom to the top, so the SCSS files will be compiled with Sass, then Autoprefixer will work its magic, it’ll then be saved as a CSS file, and finally injected into the script with a style tag.
Next, we have options for images included in the JavaScript and CSS. First, we test for image files, then pass them to the image loader which performs optimisations, and then generates URLs for them. You’ll notice the limit query string of 8192. With the limit option enabled, all files under that limit will be base64 encoded and stored in our JavaScript bundle. Any file over that size is left as is and gets linked to via a normal URL. Very clever stuff!
Finally, our last loader is the JavaScript handler which looks for .js or .jsx files in all folders (excluding node_modules and bower_components), then manipulate them with the Babel transpiler and the React hot module loader.
Lastly, at the bottom of the webpack configuration file we have our function that handles environments and adds extra sources depending on which environment we’re in. By default, the environment is ‘development’.
function getEntrySources(sources) {
    if (process.env.NODE_ENV !== 'production') {
        sources.push('webpack-dev-server/client?http://localhost:8080');
        sources.push('webpack/hot/only-dev-server');
    }

    return sources;
}
This function enables the webpack development server (DVS) and the hot swap loader to be considered entry-points to the script. If the environment variable NODE_ENV isn’t set to production, then add these sources.
Writing React, ES6 style!
That’s our webpack configuration sorted! It’s time to actually start writing some React and getting our app to build.
We need to build up our folder structure, so jump back to your terminal prompt and enter the following:
mkdir -p src/{js,css,img}
This will give you the structure:
src/
    css/
    js/
In src/css, create a file called master.scss and enter the following:
Nothing too special here really, just setting a generic font size and a JPEG image to be a repeating background image. The required JPEG is below:
Now, lets create the entrypoint JavaScript file for the app! Go to src/js and create a file called entry.js and enter what you see below:
First off, we import the CSS into our entrypoint, then we import the class HelloBox from the HelloBox file, along with React. Finally, we render the page using React, and attach it to the body.
If you tried to compile that file, it wouldn’t compile. HelloBox doesn’t exist, so it’s a bust. Let’s resolve that now, create a file called HelloBox.js:
Finally, we’ll create HelloText.js:
Awesome! We’ve written all the code we need to right now.
All the pieces come together
Remember those few scripts that were in package.json? They can act as aliases so you can run common scripts easily without having to remember how to run a certain script each time you go to run it. I defined two scripts, webpack-server, which runs the built-in webpack development server, and web-server which runs a basic Socket.IO web server (so we don’t have to deal with the file:// shortcomings).
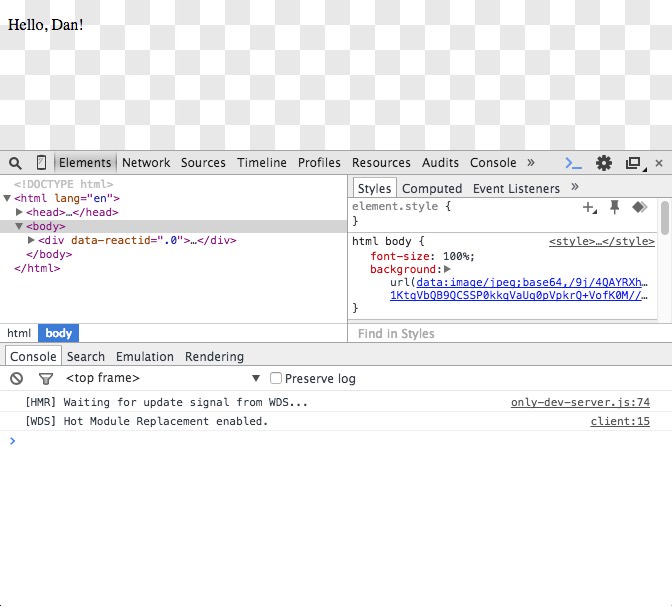
My third script is start which is simply a wrapper around the two previous server scripts. By running npm start, it boots up both the webpack-dev-server, and the http-server with the one command. By default, the webpack dev server runs on port 8080, and we tell the HTTP server to run on port 3000. If you open up your browser and load http://localhost:3000 you’ll see:
Hello, Dan!
Sweet! Open up your DevTools window to see more information about how the hot module replacement (HMR) and webpack dev server (WDS) tools are working. You’ll also notice that the image loader found that the above JPEG is less than 8192 bytes in size, so in-lined the image as a base64 encoded image.
One of my favourite parts of webpack is the ability to pass the -p flag via the command line to enable a production-ready build of the output file which will perform optimisations like minification and uglification to your code. In our config we check for a NODE_ENV value of production - to do that, simple prefix NODE_ENV=production to your command line calls, like so: NODE_ENV=production webpack -p. Check out the webpack CLI documentation for more details.
We haven’t yet seen the real power of HMR, so split your screen up so you can see both a code editor, and your browser window (preferably with the console open). Jump into HelloBox.js and change the name from Dan to Joe. Hit save and a moment later the text will change from Hello, Dan! to Hello, Joe! HMR is much more powerful than tools like LiveReload as HMR will reload just the updated component, so if you have forms that have content entered in them, that content won’t be lost (as long as it’s not a child of the updated component).
If you get stuck on one of the code examples, check out the Bitbucket repository below to download the entire example codebase.
For those of you who don’t know me, I’m a huge Laravel fan. I recently finished up a large project for a client, and I learnt many important things along the way. Below, you’ll see features of Laravel I used and loved in Laravel to make the development cycle much more enjoyable (and painless). By no means should you feel like you have to, these are merely just tips I’ve found that helped me.
Middleware is awesome - use it.Middlware allowed me to very easily filter out users who had been added to the portal, but had not activated their account. It also gave me the ability to block access to users who once had an account in this portal, but were now “archived” and no longer able to log in and make changes. Middleware is easily applied/removed to routes as you require, so use them when you can!
Form Request validators can help you save time. The Form Request classes allow you to easily abstract your form submissions into a separate step/file which in my opinion, makes for cleaner code. The portal I developed had a number of different models, and having one validation Form Request for each made it so easily to ensure the data submitted would be validated correctly. Type hinting is amazing.
Home(stead) is where the heart is. Just in case you didn’t know, Homestead is a pre-configured development environment for Vagrant that makes it painless to develop your PHP site with a modern toolset. Technically, Homestead is created for Laravel, but you can use it for any PHP project! I have the VMware Integration for Vagrant which I find to be a fair bit faster, but if you’re just checking Homestead out , the VirtualBox adapter should be more than enough.
Eloquent accessors and mutators are fantastic. Instead of jamming your create/update methods with formatting of different attributes of a model, use mutators and accessors to automatically handle all those little tasks. For example, in a project I needed an attribute to be stored in the database as JSON, but when accessed within the project, it’s automatically formatted to an array by the Eloquent model. When that array is modified throughout the lifetime of the application and then saved back to the database, it’s converted to a JSON string. It can be tempting to include validation in mutators, but I would recommend against doing that. For the most part, use it as a way to convert or format one thing to another.
Forge and Envoyer are a match made in heaven. When it came to deploying this project, I had the opportunity to deploy to a VPS, rather than a bog-standard Apache web host. I decided to deploy to DigitalOcean using Forge then continuosly deploy using Envoyer. The initial configuration of Forge + Envoyer was a bit confusing, but luckily Laracasts came to the rescue. After I got my head around how the two worked together, all updates I’ve done to the project since have been easily deployed with virtually no hassle at all.
Finally,
Testing… 1, 2, 3, testing… In Laravel 5.0.x, I was using Jeffrey Way’s Integrated testing utility, which got merged into Laravel core in 5.1. The aforementioned testing utility allows one to write tests in a more self-explanatory way. What that means is rather than getting down and dirty with PHPUnit, you can write tests like $this->visit('/')->see('Hello!'); which reads much better.
By the way, if you’re interested in signing up with DigitalOcean, please use my referral link. I scratch your back, you scratch mine :)
Note: this article I wrote originally appeared on the Humaan blog.
This article gets pretty techy! If that doesn’t sound like your bag, here’s a quick summary: the HTTP network protocol has existed since the early days of the web, and it’s about to be succeeded by HTTP/2 which will make communications between servers and browsers more efficient. It also means we need to change the way we optimise our websites to take advantage of the technology, so we don’t work against it.
The dawn of HTTP/2 is upon us. Since 1999, we’ve been using the Hypertext Transfer Protocol version 1.1 which isn’t particularly efficient. After many years of debating, HTTP/2 has been standardised, approved, and is now on its way to a browser near you. Before we see what HTTP/2 brings to the table, we should have a look at how it came to be.
A brief history
The year is 2009. Google, not satisfied with the speed of the web, developed an internal project that was known at SPDY. SPDY (not an acronym, pronounced ‘speedy’) aimed to reduce page load time by multiplexing resources through one connection between server and client, rather than having to open a new connection for each resource required to load the page.
By early 2011, SPDY was running on all Google services and happily serving to millions of users. A year later, Facebook and Twitter both implemented SPDY on the majority of their services (and within 12 months, SPDY was on all their services).
Almost three years after the initial draft, HTTP/2, née HTTP 2.0 was approved as a standard by the Internet Engineering Steering Group (IESG) and proudly bears the moniker RFC 7540. Mum and dad would be so proud. Now that we know the history behind how HTTP/2 came to fruition, what does it actually mean for you and me?
Getting ready for HTTP/2
Thankfully, there’s no deadline for having to have HTTP/2 enabled on your server, and it’s fully backwards compatible with HTTP 1.1 clients. A request from a client to a server will specify an Upgrade header with the value h2 or h2c. If this header/token combination isn’t in the request, it’s safe to say they don’t support HTTP/2, so serve them content over HTTP 1.1. Otherwise, if the client does support HTTP/2, the connection is upgraded and settings from the header HTTP2-Settings are processed by the server.
For security and privacy reasons, SPDY was built with SSL as a requirement (that’s right, SPDY wouldn’t serve content in cleartext). When SPDY was first drafted into HTTP/2, a requirement for serving HTTP/2 over Transport Layer Security (TLS) 1.2 was requested. Given the significant hassles required to get SSL certificates configured correctly, not to mention the costs associated with purchasing and maintaining said certificate, this requirement was finally dropped and HTTP/2 can serve content over cleartext (when the Upgrade token h2c is specified). c for cleartext. Got it?
On a side note, the Let’s Encrypt project by the Internet Security Research Group (ISRG) that’s launching in September 2015 aims to take the pain and cost out of SSL certificates. I personally can’t wait until the project is publicly available to everyone in a few months.
Support for HTTP/2 is relatively good at this stage, given that the standard was only approved several months ago. All the common browsers have support for HTTP/2, or will have support for it in the coming months. Chrome, Firefox, and Internet Explorer currently only support HTTP/2 over TLS (so no cleartext HTTP/2 until full implementations are completed). Server wise, IIS supports HTTP/2 in the Windows 10 beta, Apache supports HTTP/2 with mod_h2 (and little hacks), but this should be improved soon. Nginx is still working on a module, which should be released by the end of 2015.
HTTP/2, like SPDY, has the ability to keep the connection between the client and server open, continuously send data upstream and downstream without having to open a new connection for each request. This means there’s no ping pong match between the client and the server – it just goes through the existing open connection.
A change in process
To work around the overhead required for each resource to be downloaded, practises like image spriting and resource concatenation have become the de facto way to improve your site’s performance. Ironically, this practise will actually be harmful to websites that serve to HTTP/2 compatible clients.
Which means… no more concatenating! When browsing to your site, you can safely serve the core CSS required, and another CSS file required to render page-specific contents. This means that if the user only visits one page, they’ve only downloaded the core styles and styles specific to the page. Depending on the size of your CSS, you could be saving tens or hundreds of kilobytes in each request. Phenomenal stuff when you think about it.
With the lower cost of sending data to the client, this doesn’t mean you can go back to serving uncompressed JPEGs, PNGs and the like. You still need to be smart about what assets are sent to the client, along with the size of those assets. JavaScript module loaders like RequireJS will more than likely see another rise in popularity as setting up the r.js optimiser/combiner tool will not be required.
Ready for prime time?
Depending on the timeliness of full HTTP/2 support by browser and server vendors, we’re hopeful that by early 2016 the Humaan dev team will be developing with the HTTP/2-first mindset.
While the HTTP/2 standard isn’t perfect, it’s a heck of a lot better than HTTP 1.1 in many ways, the future for fast websites looks rather bright indeed. To learn more about HTTP/2, I highly recommend reading “http2 explained” by Daniel Stenberg (the genius behind cURL).
I recently started using JSON Resume to make it easier to update my résumé and I found that I didn’t really like any of the themes that were available. So, I did what any person who had a few hours free would do and developed my own… drumroll
Introducing Contempo
Now that was pretty anticlimactic. I’ve had the same résumé design for a few years now. I’ve loved its simple design, the lack of colour, and the clean layout. When it came to updating it however, it was a complete nuisance. All the horizontal rules in the template had to many adjusted each time I added a new line - to put it plainly, I hated updating my résumé! Something had to be done.
After fluffing around with Handlebars and CSS for a few hours (I’ve never used Handlebars before, I do quite like it though) I hacked together a theme that resembled my original Pages résumé document. The result is pretty close to my old résumé, my only issue is that there doesn’t appear to be a way to do footers reliably.
If you already have a published JSON Resume file you can do http://registry.jsonresume.org/yourusername?theme=contempo to preview the Contempo theme. Alternatively, cd into your JSON Resume directory then publish with resume publish --theme contempo. Last resort, if you don’t have a JSON Resume résumé, you can see my hosted résumé on JSON Resume.
The best calculator for iOS has been updated for iOS 8. Calcbot, by Tapbots, has been given a fantastic re-design and Convertbot has been merged into Calcbot (requires a small In-App Purchase.) As much as I miss the awesome skeuomorphic design of the original Tapbots style, the new design is very clean and fluid. Now I just wish I could override the Control Center shortcut to open in Calcbot now, rather than the standard Calculator app.
Jump on over to the App Store to get your copy today!