Hello 👋 I'm Dan.

I do Cloud DevOps and write PHP. I also care about web performance and security.

Caching Server 2 and iOS 7 Confusion

So it appears there is some confusion in the Apple community about whether Caching Server 2 actually caches iOS 7 app downloads. Numerous posts have been popping up saying “No, you’re wrong, it doesn’t cache iOS 7 downloads!”. I’m here to say, no, you’re wrong. It does. After some extensive testing, I will now elaborate.

First off, I’m going to install a program called Charles that acts as a proxy server. Install Charles, set it up then have your iOS device route requests through Charles so we can see exactly what’s happening. Now, before I continue, I must let you know that the app I am about to download was one that I had previously downloaded a week ago, but then deleted (my partner and I were using it for her university project) so it has already been cached on my Mavericks Caching Server. This article isn’t about the initial caching process, more about proof that it does in fact serve cached iOS App Store downloads. I have a standard OS X Mavericks Server running on a 2010 Mac mini with healthy DNS and 1 subnet, and my iPhone is running iOS 7.0.3.

The App Download In Charles.

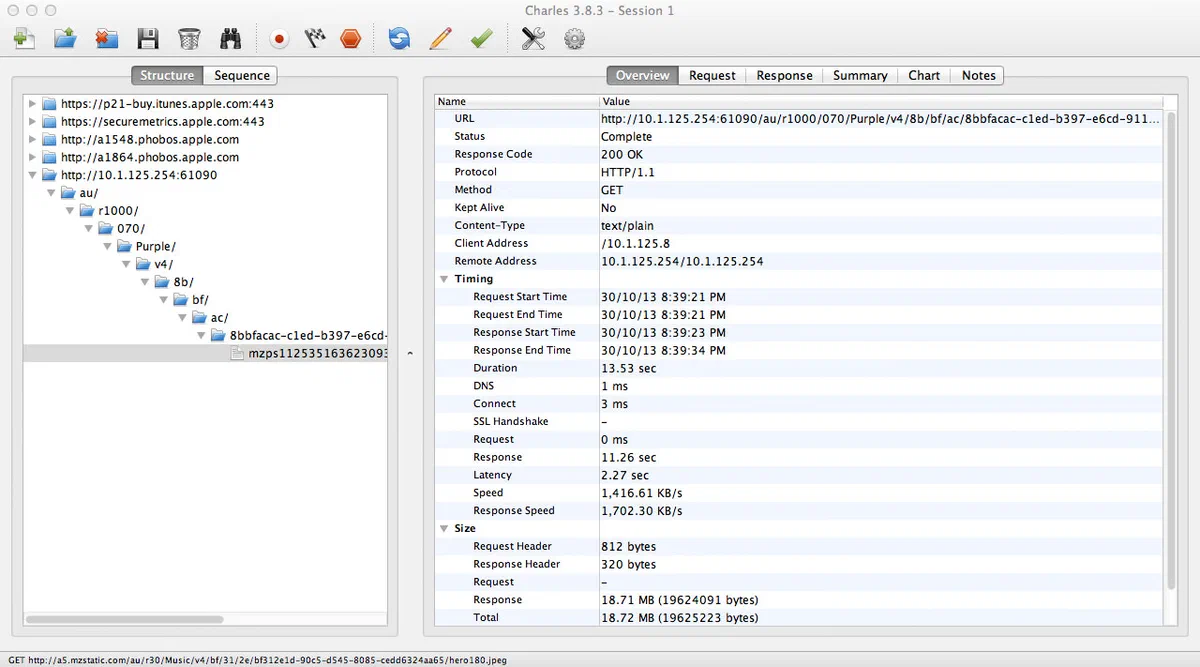
Right, so I load up the Purchases tab on my iPhone and tap on the app to download it. Now this app in question is Metronome, a small app that is 18.7 MB in size. Make sure you remember the size because it’s important. Just before I downloaded the app I opened up Charles and started a recording session. The app downloads pretty quickly and I check out what Charles has captured.

The Caching Server's Proxy Tree.

So far, it looks good. As you can sort of see by the image, my caching server at 10.1.125.254 on port 61090 responded to an App Store download request. How is that possible when Caching Server 2 doesn’t support iOS 7 app downloads? Oh wait, it does. My bad. Let’s investigate further:

My Caching Server's Response Size - Go Figure!

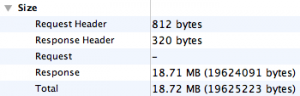
Basically, that image shows that the response from my caching server was 18.72 MB in size. Wow! Didn’t I say that the app was 18.7 MB in size? Yep, I did. But wait, that’s not the only piece of evidence I’m going to use to prove that I’m right. Next, I’m going straight to the source. Caching Server 2 stores all of the cached metadata in a database called AssetInfo.db. I’m going to copy that to the Desktop using Terminal (the folder it resides in isn’t accessible by standard Finder means).

Okay, I’ve copied the AssetInfo.db from /Library/Server/Caching/Data/ and opened it up in Base, which is a program to work with SQLite 3 databases. After opening AssetInfo.db I loaded up the ZASSET table and export all rows as a CSV. I then opened up the CSV in Excel (Oh Numbers? We all know Numbers has excellent CSV support…). Next, copying the UUID from the URI in Charles, I pasted that into a search field in Excel, and to my surprise, a row was returned! (I lie, it wasn’t a surprise. I expected it to return a result). You could also do this in Terminal, like this:

sqlite3 /Library/Server/Caching/Data/AssetInfo.db 'SELECT * FROM ZASSET WHERE ZURI LIKE "%8bbfacac-c1ed-b397-e6cd-9110eb87001b%"'

Which gets me this beautiful result:

177|1|5|0|19624091||404215540.806059|daa32fb0fc47da467fd693e12262c318|6FCE511E-C2B2-4449-99E2-0B5EC9F919B4|Fri, 07 Dec 2012 03:15:24 GMT|/au/r1000/070/Purple/v4/8b/bf/ac/8bbfacac-c1ed-b397-e6cd-9110eb87001b/mzps1125351636230933757.D2.dpkg.ipa|

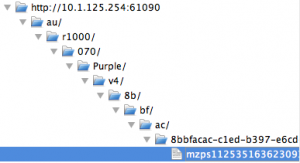
Now, one of those fields is the ZURI (aka the URI that Caching Server uses). When examining the URI in Charles, you can see the URI is the same:

http://10.1.125.254:61090/au/r1000/070/Purple/v4/8b/bf/ac/8bbfacac-c1ed-b397-e6cd-9110eb87001b/mzps1125351636230933757.D2.dpkg.ipa?source=a954.phobos.apple.com

Of course you exclude the IP address as it’s the caching server address on my LAN. The URI matches the AssetInfo.db’s ZURI field and guess what? The ZLASTMODIFIEDSTRING is the exact same date that the last update for Metronome was published (7th December 2012). I also found that the ZTOTALBYTES field, when converted to MB in Base-2, equals… 18.7 MB (which in itself is unusual, the rest of caching server calculates bytes in Base-10). Also, doing a Get Info on the binary file reveals the exact same byte count as ZTOTALBYTES.

Further to that, when I navigate to the actual binary (stored at /Library/Server/Caching/Data/<GUID>/0 by default) and enter md5 /path/to/file I get the same hash that is stored in ZCHECKSUM. For example, the hash for Metronome in the ZCHECKSUM row is daa32fb0fc47da467fd693e12262c318. Then, in Terminal I entered:

md5 /Library/Server/Caching/Data/6FCE511E-C2B2-4449-99E2-0B5EC9F919B4/0

Now, my result was daa32fb0fc47da467fd693e12262c318. Let’s compare them:

daa32fb0fc47da467fd693e12262c318 # ZCHECKSUM
daa32fb0fc47da467fd693e12262c318 # md5 Result in Terminal

Yep, they’re identical. Fact-based proof that OS X Mavericks Server’s Caching Server provides cached iOS App Store downloads to iOS 7 devices.

Now, this article has come off very douchey, but I felt it was necessary to prove to people that Caching Server 2 in OS X Mavericks Server does cache iOS app downloads.

FreeRADIUS Monitoring Script Updated for Mavericks

I’ve updated the FreeRADIUS monitoring script for Nagios with support for OS X Mavericks Server. Mavericks changed the way the FreeRADIUS server is started, along with the paths of execution and storage.

Like the update to the Caching Server 2 monitoring script, I had to write a check to see if the current OS is running 10.9, and if it is, perform a Mavericks-specific check. Like I mentioned in the other article, doing a version check and comparison isn’t particularly easy in Bash, but thankfully, I only have the compare the major and minor release numbers which is nice given that it’s also a float. Using bc (the arbitrary precision calculator language - I should get that on a shirt!) I can quite easily calculate the difference between 10.8 and 10.9. Anyway, check the code below for how I get the version number.

sw_vers -productVersion | grep -E -o "[0-9]+\.[0-9]"

Next, the comparison is performed to see whether the current OS is less than 10.9. If the current OS is less than 10.9, 1 is returned. If it’s the same (or greater), the result is 0. This code is below:

echo $osVersion '< 10.9' | bc -l

Note that the above example requires the variable $osVersion. If you were hard coding the values, you could do something like below:

echo '10.8 < 10.9' | bc -l

The major difference in my script for OS X Mavericks is now there’s actually a process running called radiusd! Using ps and grep I now check to see if the FreeRADIUS server is running by doing this:

ps -ef | grep radiusd

Which, if the FreeRADIUS (or radiusd) is running, will return a non-empty string. If you run that and get an empty string (or nothing) back then your FreeRADIUS server isn’t running. Shit. I recommend doing radiusd -X to start your RADIUS server in debug mode. That or you forgot to get RADIUS added to launchd by entering radiusconfig -start. Anyway, that’s enough chit-chat, just get the damn code from the link below:

Check out the code on GitHub!

OS X Mavericks Server - Adding Groups

Along with adding users to your OS X Mavericks Server’s Open Directory you can also add groups to contain specific users to specific groups. For example, your sales team might have their own group called sales that provides them specific file sharepoints, jabber group and even add a special group mailing list for all users in that group. The group also allows you to specify different ACLs for each group.

Contents

  • Workgroup Manager
  • Command Line Goodness

First, I recommend following my guide adding users to add users to your Open Directory domain because groups are pretty useless without users! Anyway, onwards and upwards.

Server: No Groups Yet.

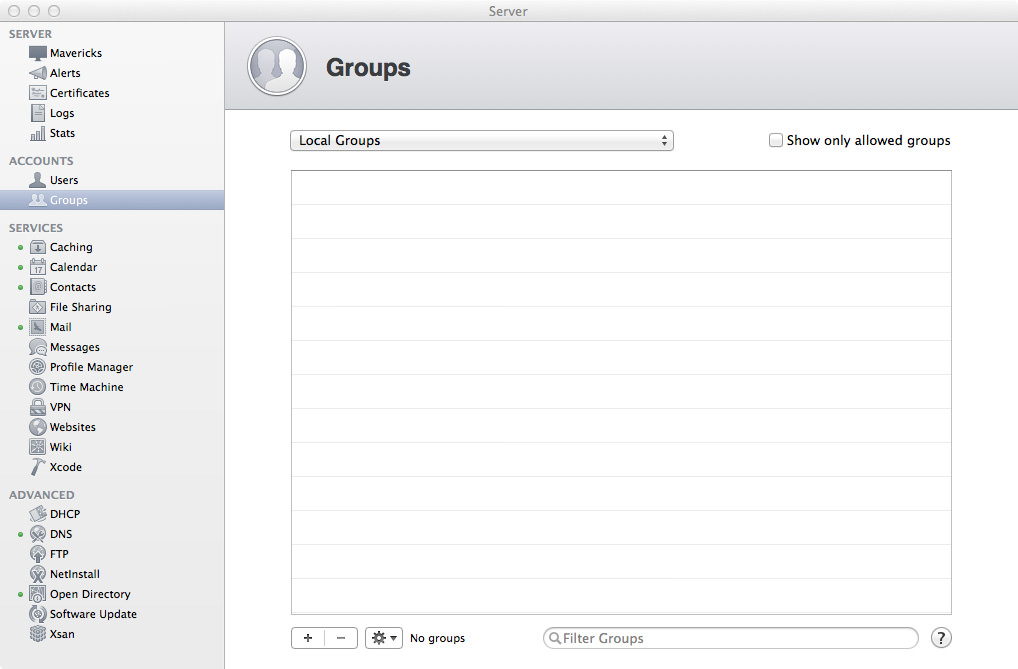
Okay, jump over to the Server app and load up the Groups section. If this is a base installation with Open Directory, you should only see one group in the Local Network Groups and it’s called Workgroup. By default, any user you add to the Open Directory domain will be added to this group. Given that I’m still rolling with characters from The Office, I’ll add some groups that relate to the users we added earlier. Click the plus in the bottom-left corner to add a new group.

Groups: Adding the Accounting Group.

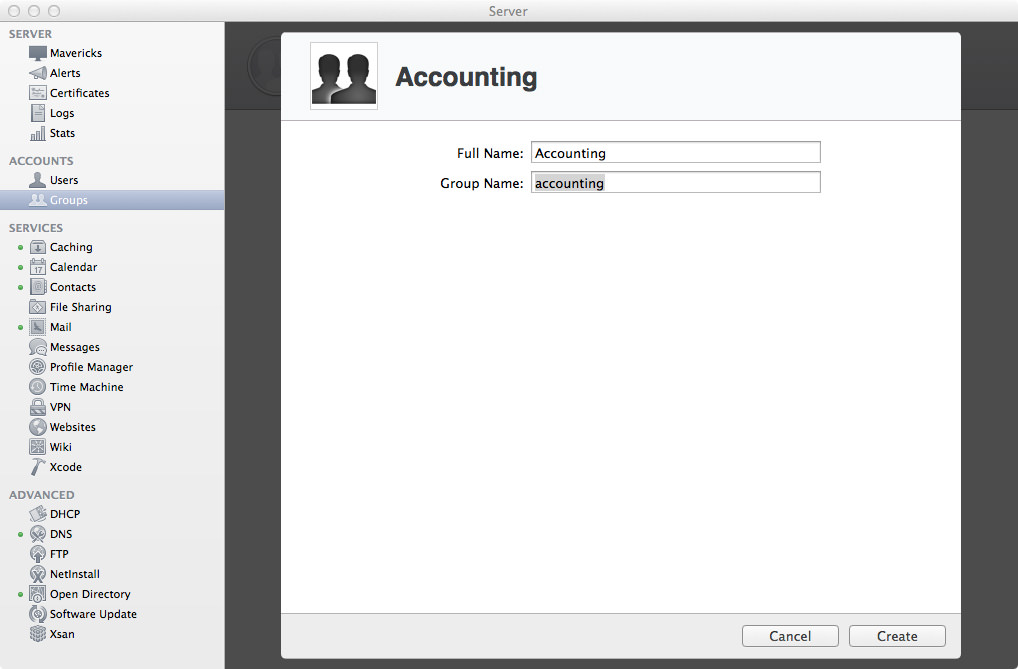
First off, I’m going to make a group called Accounting. For the Full Name, enter Accounting and the Group Name will be accounting. Once you’ve entered those details, go ahead and click the Create button to add the group. Initially when you add the group there’s hardly any configuration aside from the name. Believe me, there’s more configuration to be done once you’ve added the group!

You’ll now be taken back to the list of groups, but now the group you just added will be in that list. Hooray! But we can’t celebrate yet because our group has no one in it! Let’s change that. Double click on your group to modify the settings and add/remove users.

Groups: Edit the Accounting Group

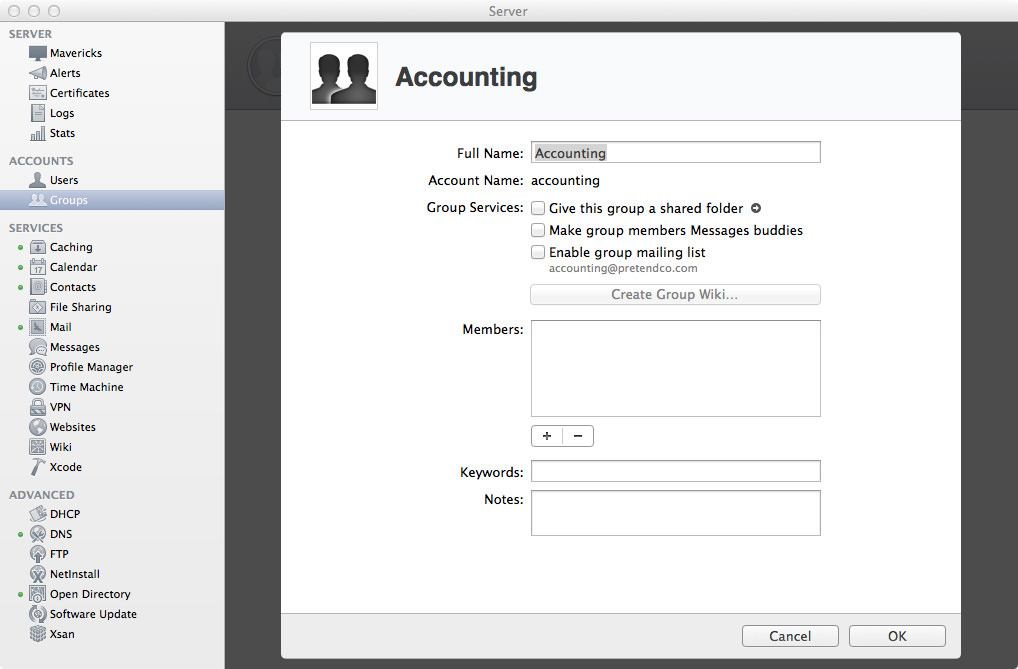
Alrighty then, we can now modify some settings. First thing you’ll notice is that you can rename the “nice” name of the group, but you can’t change the shortname. Basically, if you didn’t name your group correctly the first time and you want to change its name, just delete the damn thing and create a new one. This may be more tedious if you’ve been using the group for a while, so make sure you do it right the first time. Next thing is giving the group a special shared folder on the Server, which is located at /Groups/<groupshortname> on the server. Enable this if you want that folder to be enabled, otherwise if you have your own folder structure you’re following, you can just add this group to the folder’s ACL.

Next is making the group members all buddies in Messages (or jabber). Enable it if you want the members to automatically be friends if they have the Messages app set up. If you’re not using the inbuilt Messages server, this option won’t need to be enabled. For the curious, if you enter the following command into Terminal, you’ll be shown all the groups and their Messages autobuddy status.

sudo serveradmin settings accounts

For example, if I were to enable or disable autobuddy via Terminal for the group accounting, I would enter the commands below:

sudo serveradmin settings accounts:GroupServices:EnableAutoBuddy:accounting = no # Disble autobuddy
sudo serveradmin settings accounts:GroupServices:EnableAutoBuddy:accounting = yes # Enable autobuddy

The next easy option is setting up a mailing list which, when email is sent to that address, will be sent to all the members of the group. This email address is the group’s short name. For example, accounting@pretendco.com or sales@pretendco.com. By default, only members of the group can send emails to that mailing list, otherwise, enable the “Allow mail from non-group members” to enable emails from anyone (yes, it’s literally everyone - not just people in the Open Directory domain).

Groups: Adding Users and Groups to Accounting.

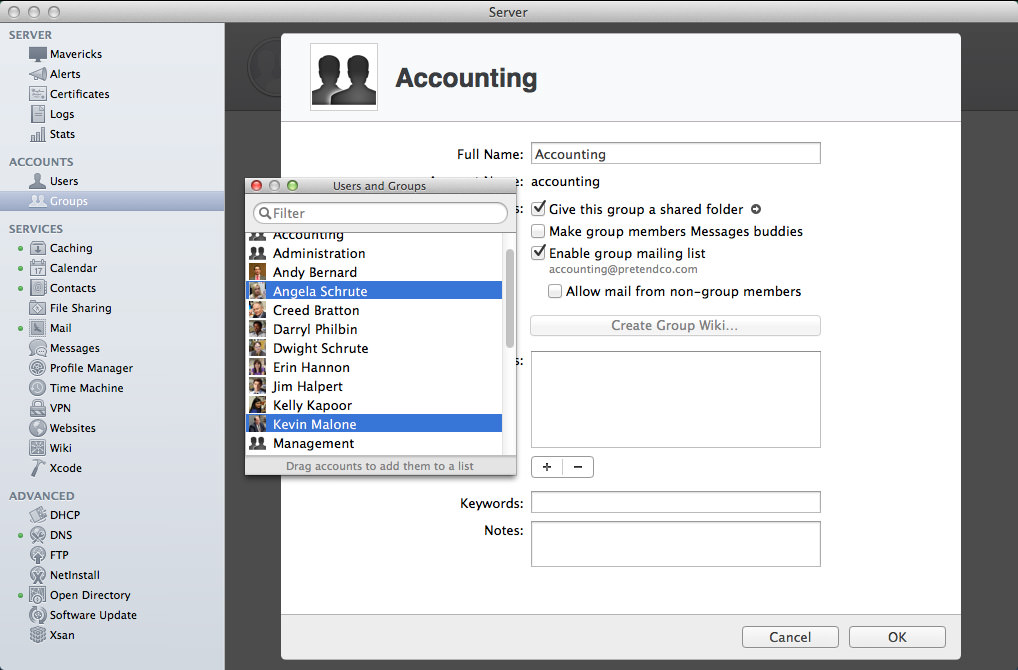
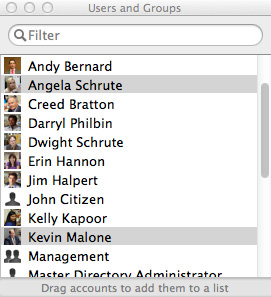
It’s now time to add members to the group! Not only can you add users to a group, but you can also add groups to other groups! There’s a very cool hierarchy that you can configure with users and groups, but don’t over-complicate it otherwise your ACL precedence and inheritance are going to be very, very confusing. When you click the plus you can either start typing in a user name or group name (and it will auto suggest then click on the user to add it), otherwise, start typing browse then select Browse to bring up a list of all applicable users and groups that can be added to the group.

The Users and Groups Browse List.

As per usual, you can add keywords and notes for the group. Once you’re done editing the group, click OK to save your changes.

Workgroup Manager

As with every other OS X Server release there has been a program called Workgroup Manager (internally I’ve heard the nickname Workgroup Mangler) which shows you all the users, groups, machines and machine groups for Open Directory domains. First off, Workgroup Manager isn’t distributed with Server so we need to download it seperately off Apple’s website so click here to download. Once you’ve downloaded and installed Workgroup Manager, open it up and connect to your server! Go to Server then click Connect…

Workgroup Manager: Connect to Server.

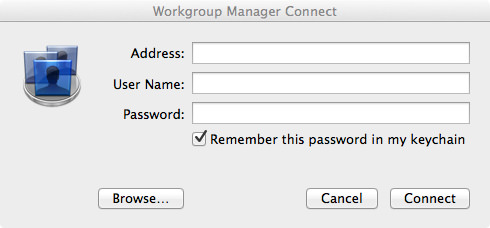
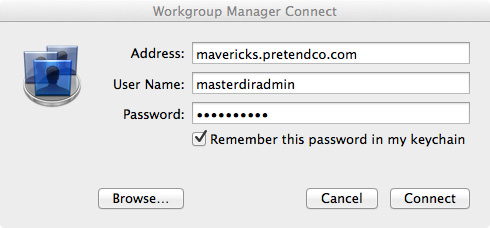
Enter details for your local server to connect. For example, the address will be the FQDN (remember what that stands for?) so my server will be mavericks.pretendco.com. If you want to make any edits you’ll need to be logged in as the Master Directory Administrator (or any other user you’ve given Server administration rights to). If you’re just connecting to browse the Open Directory domain, log in as any admin user (for example, my Server Administrator login for the Server machine gives me read-only access to the Open Directory domain). Next, enter the applicable password. Hit Connect to… you know… connect.

Workgroup Manager: Connect to mavericks.pretendco.com

If all goes well and you’ve entered the correct details you should now be shown a list of all the users in your Open Directory domain! Hooray!

Workgroup Manager: The User List.

You’ll notice that in the list of users, any user that has a pencil in their icon means that they have administration rights for the Open Directory domain you’ve connected to. Anyway, just above the list of users are four icons, the second one from the left is Groups - click it.

Workgroup Manager: The Group List.

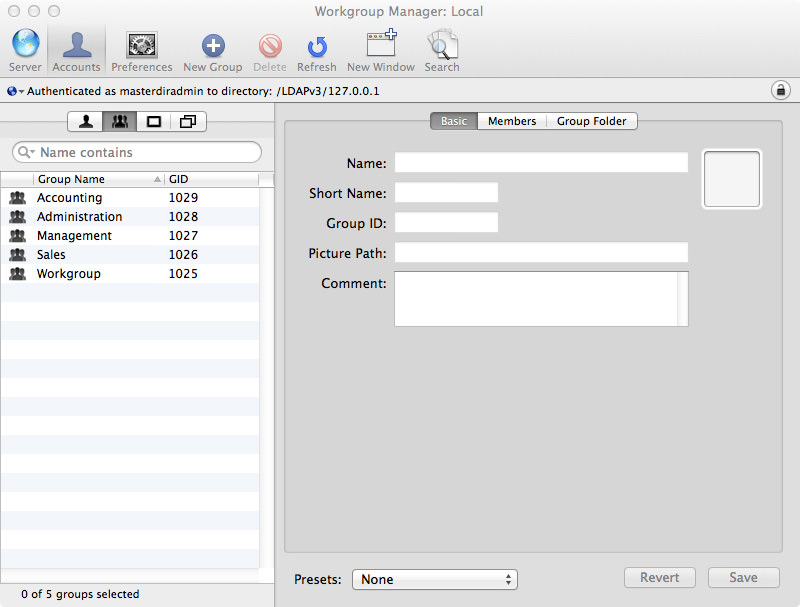
Excellent, we can now see all the groups in the Open Directory domain. Clicking on any group will show you the basic settings for the group, you can also change memberships for the group and even the Group Folder. Have a look around in Workgroup Manager, but make sure you know what changes you’re making, you could permanently damage a user or group by making the wrong change (word of advice, don’t change short names or IDs).

Command Line Goodness

Accessible via Terminal is the very powerful command dseditgroup which as you might guess, allow you to edit directory service groups. The name of the command however is a bit of a misnomer given that you can do more than just edit the group. I personally think the command should be called dsgroup but that’s just me. Anyway, now onto the usefulness of this command. Given that we’ve been playing with the group accounting, let’s use this command to show us details about the group!

dseditgroup -o list accounting

Essentially what we’re doing here is using the -o flag (otherwise known as operation), we specify that we’re requesting a list of the accounting group. Here’s the output of dseditgroup for the group accounting on my system:

dsAttrTypeStandard:GroupMembership -
    aschrute
    kmalone
    omartinez
dsAttrTypeStandard:Member -
    aschrute
    kmalone
    omartinez
dsAttrTypeStandard:GeneratedUID -
    B6131BAA-B8CE-4828-8BE3-3BA03A8EAF43
dsAttrTypeStandard:OwnerGUID -
    DC18DEB1-35C6-44AA-80E2-E9EC8ABB52E3
dsAttrTypeStandard:AppleMetaRecordName -
    cn=accounting,cn=groups,dc=mavericks,dc=pretendco,dc=com
dsAttrTypeStandard:AppleMetaNodeLocation -
    /LDAPv3/127.0.0.1
dsAttrTypeStandard:RecordType -
    dsRecTypeStandard:Groups
dsAttrTypeStandard:GroupMembers -
    40013EA2-8EC9-46AE-9C50-440B26D67E53
    44781E25-B92D-48FF-AFB7-34254D3FBC34
    288217B9-EA79-40D7-ACAF-AA24D4F1FA62
dsAttrTypeStandard:PrimaryGroupID -
    1029
dsAttrTypeStandard:RealName -
    Accounting
dsAttrTypeStandard:RecordName -
    accounting

Another useful command if you just want to check to see if a particular user is a member of a particular group, you can enter the following:

dseditgroup -o checkmember -m <usershortname> <groupshortname>

For example, if I want to check to see if Oscar Martinez is a member of Accounting, I can enter this:

dseditgroup -o checkmember -m omartinez accounting

You should get the response below:

yes omartinez is a member of accounting

Or if if the user isn’t a member of the group, you’ll get the following response:

no jhalpert is NOT a member of accounting

Finally, another way of looking up groups via the command line is by using dscl, or the Directory Service command line utility. To get a list of all the groups in the local Open Directory domain, you would use the command below:

dscl /LDAPv3/127.0.0.1/ -list /Groups

This give you the shortname of each group:

accounting
admin
administration
com.apple.limited_admin
management
sales
staff
workgroup

If you prefer to get a little bit more information, you can also request a specific value like GeneratedUID, RealName, AppleMetaRecordName or Member. If I wanted to get a list of the shortnames of members for each group I could enter something like below:

dscl /LDAPv3/127.0.0.1 -list /Groups Member

Which will in turn show me all the groups and their members (as requested):

accounting      aschrute kmalone omartinez
admin           masterdiradmin mscott
administration  omartinez cbratton mpalmer kmalone dphilbin ehannon aschrute tflenderson kkapoor
management      mscott phalpert
sales           abernard jhalpert dschrute shudson phalpert rhoward plapinvance
staff           root
workgroup       jhalpert mscott phalpert dschrute rhoward abernard aschrute kkapoor omartinez dphilbin ehannon tflenderson kmalone plapinvance shudson mpalmer cbratton ictadmin

Caching Server Nagios Script Updated for Mavericks

Just a quick heads up that Jedda and I’s check_osx_caching monitoring script for Nagios and OS X has been updated to support OS X Mavericks Server. Given that Caching Server 2 in 10.9 adds more verbosity to what content is taking up what space, I’ve added support for each content type and has been added to the performance data that is returned in the script.

As content usage is not tracked in Mountain Lion’s Caching Server I had to do a check of the operating system to see what version the script is being run on. To do this, I used the function sw_vers and added the flag productVersion to only have the product version returned. Now, on a first release of the OS you’ll get a clean float like 10.9 or 10.8 which makes it really easy to do a comparison using bc (a precision calculator language). Where it becomes a problem is when you get numbers like 10.8.5 which, because they have two periods, mean they don’t work with bc. I decided I could either write a function that does a full comparison of the version numbers, or just get the major and minor release and do a standard mathematical float comparison. Using grep I can pull the major and minor release information and assign it to a variable. See below for the code:

sw_vers -productVersion | grep -E -o "[0-9]+\.[0-9]"

Next, the comparison is performed to see whether the current OS is less than 10.9. If the current OS is less than 10.9, 1 is returned. If it’s the same (or greater), the result is 0. This code is below:

echo $osVersion '< 10.9' | bc -l

Note that the above example requires the variable $osVersion. If you were hard coding the values, you could do something like below:

echo '10.8 < 10.9' | bc -l

Now, if the value of the expression is 0, we will now grab all the Mavericks Caching Server usage data, and assign it to a variable called mavericksPerfData which is appended to the end of the final return printf.

I’ll be updating our RRDtool graph for the Caching Server 2 and will post the code soon! Stay tuned.

Check out the code on GitHub!

OS X Mavericks Server - My Tutorials

Over the past few weeks I’ve been writing tutorials for OS X Mavericks Server, and now that it has come out, I can finally post all my articles! See below for the list:

I hope you enjoy these articles. Please let me know if you have any queries or input by messaging me on Twitter at @yesdevnull.

OS X Mavericks Server - Setting Up FreeRADIUS

In the past year or so I’ve done a few more deployments using OS X Server’s inbuilt FreeRADIUS server for authentication via enterprise Wi-Fi base-stations and routers. While OS X Server will automatically configure RADIUS for AirPort base-stations, there’s no way via the Server GUI to configure third-party authenticators.

My buddy Jedda wrote an excellent article last year on configuring RADIUS for 10.8 Server, but in Mavericks Server, things have changed slightly. FreeRADIUS has been updated from 2.1.12 to 2.2.0 and all the configuration files have been moved from /etc/raddb to /Library/Server/radius/raddb.

First off, we will need to add the user to the RADIUS access group, which is called com.apple.access_radius. Any user that will authenticate through RADIUS must be added to this group.

dseditgroup -q -o create -u <admin_user> -a <your_username> -n . com.apple.access_radius

For example, as I’m doing this on the same server as the FreeRADIUS server, I’m going to add my Server Administrator user (serveradmin) to the RADIUS access group. I entered the command below:

dseditgroup -q -o create -u serveradmin -a serveradmin -n . com.apple.access_radius

Okay, now onto the proper configuration. Lets start by changing a few RADIUS settings so we can get some more verbosity in the logs regarding authentication attempts. By default, RADIUS does not log authentication requests, let’s change that. By entering the following command, radiusconfig changes a variable in the /Library/Server/radius/raddb/radiusd.conf to now log authentication requests.

sudo radiusconfig -setconfig auth yes

Note: for the curious, radiusconfig’s location is /Applications/Server.app/Contents/ServerRoot/usr/sbin/radiusconfig.

Next, we’ll enter a command to log bad authentication requests. This also changes a variable in the above file, it’s a few lines further down in the config file.

sudo radiusconfig -setconfig auth_badpass yes

Now, let’s also log successful authentication requests:

sudo radiusconfig -setconfig auth_goodpass yes

It’s now time to add a client to the RADIUS server. Any device that directly communicates with the RADIUS server must first be added to a list before it’s allowed to start processing requests. The structure of the command is as follows:

sudo radiusconfig -addclient ip_address identifier nas_type

For example, if your Wi-Fi base-station allows RADIUS authentication, you can use it to be an authenticator for your RADIUS server. First of all, your Wi-Fi base-station must have a static IP address on the network, because as I mentioned earlier, each device must be manually defined before it’s allowed to authenticate to the RADIUS server. Next up, the identifier is a way you can easily identify the Network Access Server (NAS), and must be unique it is used in Access-Request packets. The RFC recommends using the FQDN for the identifier. Finally, we specify the NAS Type. Typically you would use other unless you have a special device that uses another NAS Type. You can review /Library/Server/radius/raddb/clients.conf to see if you need to use another NAS Type identifier.

Bearing all that in mind, let’s set up a client for the network. Pretend that you have an Aerohive AP that can be used to authenticate users that connect to a WPA2 Enterprise wireless network. The Aerohive AP 330 sits on the network at 10.1.125.150 and has an A record for aerohive.pretendco.com. As this device doesn’t have a special identifier that’s required by RADIUS we will use other. With all these details, let’s add the client using radiusconfig:

sudo radiusconfig -addclient 10.1.125.150 aerohive.pretendco.com other

You’ll now be asked to provide a shared secret that is used to encrypt packets sent between the NAS and the RADIUS server with md5. Best to use an app like 1Password to generate a random alphanumeric shared secret. Make sure you save this shared secret, because you’ll need to give it to the Aerohive later on so it can communicate with the RADIUS server. Once you provide the shared secret, hit Return. You should get the following message:

10.1.125.150 added to the nas list

Hooray, the Aerohive has been added to the NAS list! Now, we need to give the RADIUS server a real certificate. When RADIUS is run for the first time it will automatically generate a self-signed certificate that it uses to provide security to users. This is okay if you’re testing RADIUS, but in a live environment, you should really be providing your own certificate that is signed by a known Certificate Authority (CA). You can get SSL certificates from a number of providers, check out Namecheap for great value SSL certificates. As this article is about configuring RADIUS, I’m going to assume your certificate is signed by a globally recognised Certificate Authority.

Open up Keychain Access then on the left-side click on the System keychain. Scroll down the list until you find the certificate and private key with your FQDN. For example, the server I’ve been using in these articles has a FQDN of mavericks.pretendco.com, using the command key I’ll click on the certificate and private key that’s called mavericks.pretendco.com. Now, go to File, then click on Export Items…"

Save the file as a Personal Information Exchange (.p12) on the Desktop called RADIUS. You’ll now be asked to authenticate to unlock the System keychain. Next, enter in a password that will be used to secure the certificate and private key file. For this example, I’m using server but please never use this in production environments! Enter the password twice then hit OK. Your RADIUS.p12 will now be available on the Desktop.

Jump back to Terminal because we’re now going to export these into the certs folder in raddb. We first need to export the private key as a .key. Enter the following command to replace the default .key with our own. Make sure you have that password you used to encrypt the exported items handy as you’ll have to enter it for the next two commands.

sudo openssl pkcs12 -in ~/Desktop/RADIUS.p12 -out /Library/Server/radius/raddb/certs/server.key -nodes -nocerts

Enter in the password for the .p12, then hit Return. Now, we will export the certificate, and override the default one in the process.

sudo openssl pkcs12 -in ~/Desktop/RADIUS.p12 -out /Library/Server/radius/raddb/certs/server.crt -nodes -nokeys

Like the last command, enter the password for the .p12 then hit Return. Now, using Terminal lets change directory to certs folder by entering the following command:

cd /Library/Server/radius/raddb/certs

We’re now going to validate that the modulus of both the private key and certificate are the same to ensure we have the right certificates, and to ensure that they are for the same matched pair. Enter in the following command to get the modulus of the certificate:

openssl x509 -noout -modulus -in server.crt | openssl md5

This will echo out an md5 hash of the modulus of the certificate. Now enter:

openssl rsa -noout -modulus -in server.key | openssl md5

Another md5 hash of the private key’s modulus will be echoed. Here’s the md5 hash of both my private key and certificate

222b9f6176126d06872c56809a0ef34b # server.crt
222b9f6176126d06872c56809a0ef34b # server.key

Check the numbers to ensure they match, because if they don’t you have the wrong certificate and private keys! After ensuring that the modulus’ match, we will now configure RADIUS to use our supplied certificates. Enter the following command into Terminal:

radiusconfig -installcerts /Library/Server/radius/raddb/certs/server.key /Library/Server/radius/raddb/certs/server.crt

Note that the private key must come before the certificate, otherwise the command won’t work. The RADIUS server will now generate a random and dh file (very important for the RADIUS server) and should only take up to 10 seconds to complete. Once that has completed, we’re now ready to test the RADIUS server! We’re first going to start FreeRADIUS in debug mode to ensure it’s starting correctly.

radiusd -X

The FreeRADIUS server will start up within seconds and the last line you should see in your Terminal prompt is Ready to process requests.. Great, it’s now running happily. Terminate the process by hitting Ctrl+C (^C) and we’ll get the FreeRADIUS server setup with launchd so it’ll start every time the server is rebooted.

sudo radiusconfig -start

This’ll add the org.freeradius.radiusd.plist (which is located in: /Applications/Server.app/Contents/ServerRoot/System/Library/LaunchDaemons/org.freeradius.radiusd.plist) to launchd. Let’s now test it out via Terminal to make sure we can communicate with the FreeRADIUS server. Our command structure is as follows:

echo "User-Name=<username>,User-Password=<password>,Framed-Protocol=PPP " | radclient -x -r 1 -t 2 localhost:1812 auth testing123

We have to pipe in a few authentication details to radclient, then provide the details for the RADIUS server. If you’re running this on the same machine as the FreeRADIUS server, your shared secret is testing123. I will enter the following settings to test on my server:

echo "User-Name=serveradmin,User-Password=serverpass,Framed-Protocol=PPP " | radclient -x -r 1 -t 2 localhost:1812 auth testing123

You should see the following result:

Sending Access-Request of id 220 to 127.0.0.1 port 1812
    User-Name = "serveradmin"
    User-Password = "serverpass"
    Framed-Protocol = PPP
rad_recv: Access-Accept packet from host 127.0.0.1 port 1812, id=220, length=32
    Framed-Protocol = PPP
    Framed-Compression = Van-Jacobson-TCP-IP

That’s it! The last thing we’ll do is allow Console to display the radiusd.log so we can read it. For the last time, jump in to Terminal and enter the following command:

chmod -R 755 /var/log/radius

Open up Terminal and now you can view the radiusd.log! Use it to troubleshoot any issues you may have.

Well, you’re all done now. You have configured a FreeRADIUS server, and it can process requests successfully, along with authenticating the allowed users.

OS X Mavericks Server - Setting Up Caching Server

The Caching Server in OS X Mavericks Server is used to speed up downloads of content distributed by Apple over the internet. Caching Server caches all updates, App Store and iBooks downloads, and Internet Recovery software that your OS X v10.8.2+ and iOS 7 devices download.

Contents

  • Shared Caching Over Subnets
  • Peer Review
  • Monitoring
Caching Server - Hasn't Been Started Yet.

Caching Server 2 which came out with OS X Mavericks Server raised the bar from Caching Server in OS X Mountain Lion Server by adding software updates, iOS app updates, iBooks and Internet Recovery downloads. Also added is the support for multiple Caching Server 2 servers on the same public IP network. If there are multiple Caching Servers on the same network and one doesn’t contain a requested download, the Caching Server will consult with its peer servers on the same network to see if they have the requested download. This information is then passed onto the client, that will then select the right server automatically.

One important thing to note is that from OS X v10.8.2, Caching Server will do all software updates for clients, this doesn’t necessarily mean it can replace the Software Update Server that has been with OS X Server for a long time. Even though Software Update Server does require more maintenance and client configuration (you have to configure each client), you still maintain control over which clients get which updates. Caching Server 2 does not have the ability to deny updates for any devices. Maybe that will be added in the future, but for now if you need to control who gets what update, Caching Server 2 is not for you.

Okay, enough chit-chatter, let’s get Caching Server 2 running! Open the Server app then click on the section named Caching. Depending on your requirements, you might want to store all the downloads on a separate drive that’s connected to the server. I usually configure servers with small SSD boot drives, so storing Caching Server 2 downloads on a small SSD is not an option. Once you’ve chosen your storage device, you can now select the maximum cache size for Caching Server 2. There’s only one rule with Caching Server 2 storage, the minimum storage size is 25GB. Caching Server 2 has a buffer of 25GB where the least-used content is deleted to make way for more popular and requested downloads. We’re now ready to start the caching server! Hit the On button in the top-right corner.

Caching Server After Some Content Has Been Cached.

After Caching Server 2 has started, try going to the App Store and downloading a few apps, and iBooks to download a few books. Check back in a few minutes to see your Usage graph, it should now be populated with details of the usage split, with detailed numbers of how much each cache category is using. Another way to check out how Caching Server 2 is going is by using Terminal! Open up Terminal and enter the following command:

sudo serveradmin fullstatus caching

You should see something like below:

caching:Active = yes
caching:state = "RUNNING"
caching:CacheUsed = 125027720
caching:Port = 61090
caching:TotalBytesRequested = 124886938
caching:RegistrationStatus = 1
caching:CacheLimit = 25000000000
caching:CacheFree = 4025427456
caching:Peers = _empty_array
caching:TotalBytesFromPeers = 0
caching:StartupStatus = "OK"
caching:TotalBytesFromOrigin = 124886938
caching:CacheStatus = "OK"
caching:TotalBytesReturned = 124886938
caching:CacheDetails:_array_index:0:BytesUsed = 60543656
caching:CacheDetails:_array_index:0:LocalizedType = "Mac Apps"
caching:CacheDetails:_array_index:0:MediaType = "Mac Apps"
caching:CacheDetails:_array_index:0:Language = "en"
caching:CacheDetails:_array_index:1:BytesUsed = 53730125
caching:CacheDetails:_array_index:1:LocalizedType = "iOS Apps"
caching:CacheDetails:_array_index:1:MediaType = "iOS Apps"
caching:CacheDetails:_array_index:1:Language = "en"
caching:CacheDetails:_array_index:2:BytesUsed = 10753939
caching:CacheDetails:_array_index:2:LocalizedType = "Books"
caching:CacheDetails:_array_index:2:MediaType = "Books"
caching:CacheDetails:_array_index:2:Language = "en"
caching:CacheDetails:_array_index:3:BytesUsed = 0
caching:CacheDetails:_array_index:3:LocalizedType = "Movies"
caching:CacheDetails:_array_index:3:MediaType = "Movies"
caching:CacheDetails:_array_index:3:Language = "en"
caching:CacheDetails:_array_index:4:BytesUsed = 0
caching:CacheDetails:_array_index:4:LocalizedType = "Music"
caching:CacheDetails:_array_index:4:MediaType = "Music"
caching:CacheDetails:_array_index:4:Language = "en"
caching:CacheDetails:_array_index:5:BytesUsed = 0
caching:CacheDetails:_array_index:5:LocalizedType = "Other"
caching:CacheDetails:_array_index:5:MediaType = "Other"
caching:CacheDetails:_array_index:5:Language = "en"

When your caching server first connects to Apple’s servers to let them know we have set up a caching server, it is assigned a GUID that other peers and clients can use to identify the server. To obtain this GUID you can enter the following into Terminal:

sudo serveradmin settings caching:ServerGUID

Shared Caching Over Subnets

A nifty feature is the ability for the caching server to traverse across subnets to share cached downloads. This feature is enabled by unticking the “Only cache content for local networks”. By default, Caching Server will only cache content for the current subnet (in my case, 10.1.125.0-10.1.125.255). An alternative way to enable multi-subnet caching through Terminal is to alter the LocalSubnetsOnly option, do this command to enable subnet traversal:

sudo serveradmin settings caching:LocalSubnetsOnly = no

This change doesn’t require a reboot of the Caching Server, but reboot just to make sure. If you want to disable subnet traversal, do this:

sudo serveradmin settings caching:LocalSubnetsOnly = yes

Those changes that you make will be reflected in the logs. If you take a look in the Debug.log (located at /Library/Server/Caching/Logs/Debug.log) you’ll see something like this:

2013/10/31 18:09:36:979  Registering with local address: 10.1.125.254; local subnet range only: 10.1.125.0-10.1.125.255
2013/10/31 18:09:38:284  Request for registration from https://lcdn-registration.apple.com/lcdn/register succeeded
2013/10/31 18:09:38:284  Got back public IP xx.xx.xxx.xx
2013/10/31 18:09:38:288  This server has 0 peer(s)

This feature requires you to be using Network Address Translation (NAT) and the same public IP address - both requirements of Apple. If you have multiple subnets if your office or workplace but only have the resources for one Caching Server, it would be wise to enable this feature on the server. Also make sure your firewall will allow traffic over port 61090/TCP for internal traffic only (this port may need to be changed if you specified a custom port when configuring caching server, or if you have multiple caching servers). If you don’t know what port your Caching Server is available at, you can enter this command to find out:

serveradmin fullstatus caching | grep "Port"

In most cases you should have 61090 returned. Generally, the only time this will be different is if you have multiple caching servers (see below) in the one workplace.

If you have a look at the settings for Caching Server in Terminal, you’ll see that the Caching Server port is set to 0. This means that when it starts up it’ll check for an available port on startup and choose an appropriate one (I presume this is defined when it registers with Apple). For example: if Caching Server was hard-wired to start on 61090, some of your machines or firewall may detect conflicts. Otherwise, you can hard-code a port for it to run on by firstly shutting down the Caching Server in the Server app, or in Terminal by entering sudo serveradmin stop caching. Next, decide on a port that you know to be available. As far as I can tell any port is okay, as long as it’s not already in use on the LAN. If I wanted to specify the Caching Server to run on 61000 I would enter this into Terminal:

sudo serveradmin settings caching:Port = 61000

Hit return then start Caching Server either in the Server app or by entering sudo serveradmin start caching. Give the Caching Server a few seconds to start, then enter sudo serveradmin fullstatus caching. I’ll trim the output, but the line you’re looking for should now show this:

caching:Port = 61000

Huzzah! Your Caching Server is now running on your custom port. Change it back to 0 if you want it to randomise the port on registration. Note that changing it back to default may not take into effect straight away, you may have to reboot Caching Server after a little while as Caching Server will cache registration settings, along with its last port (found with defaults read /Library/Server/Caching/Config/Config.plist LastPort). I’ve also updated the Nagios script for checking Caching Server to include port-specific checks, check it out!.

Peer Review

I really like the idea of a peer-based system with Caching Server 2 so I decided to spin up another OS X Mavericks Server instance and get it set up with Caching Server 2 also. After getting them both registered with Apple’s backend system (an automated process by the way, and should only take 2 minutes for each machine), I ran sudo serveradmin fullstatus caching on both machines so I could check out what the caching:Peers array would hold. Here are my results:

mavericks.pretendco.com - 10.1.125.120:

caching:Peers:_array_index:0:guid = "7B4E17C1-14E2-48E0-8062-34660B4C041B"
caching:Peers:_array_index:0:version = "73"
caching:Peers:_array_index:0:healthy = yes
caching:Peers:_array_index:0:address = "10.1.125.121"
caching:Peers:_array_index:0:port = 50294

replica.pretendco.com - 10.1.125.121:

caching:Peers:_array_index:0:guid = "8594F0EF-E810-4993-A74F-A1473C6B099D"
caching:Peers:_array_index:0:version = "73"
caching:Peers:_array_index:0:healthy = yes
caching:Peers:_array_index:0:address = "10.1.125.120"
caching:Peers:_array_index:0:port = 49486

On each machine you can also enter sudo serveradmin fullstatus caching | grep TotalBytesFromPeers and sudo serveradmin fullstatus caching | grep TotalBytesFromOrigin to get the number of bytes transferred from peers and origin respectively. I noticed a huge speed increase when downloading a purchased app from the App Store when it had already been cached by the other caching server - as you would expect. After downloading about 15 different apps across my two OS X Mavericks Server instances, I check out the cached totals via the command line. Here’s what I got:

mavericks.pretendco.com - 10.1.125.120:

caching:TotalBytesFromPeers = 4957598
caching:TotalBytesFromOrigin = 15591778

Which equates to 4.96 MB from peers and 15.59 MB from itself.

replica.pretendco.com - 10.1.125.121:

caching:TotalBytesFromPeers = 17628454
caching:TotalBytesFromOrigin = 167213809

Which equates to 17.63 MB from peers and 167.21 MB from itself.

Note: Caching Server reports all its usage in the SI format, not the standard base 2 format, so make sure you factor that in to any calculations you may make.

Monitoring

Along with the original Caching Server, Caching Server 2 has a whole host of options to check the health of the service via the command line. Here’s a few commands you can use the ensure Caching Server 2 is alive and happy!

sudo serveradmin fullstatus caching | grep "Active"

This will return no if the service is in “STARTING” mode, and will not return anything if the service is in “STOPPED” mode.

sudo serveradmin fullstatus caching | grep "StartupStatus"

This should return “OK” if the service is running OK (d’uh, that’s obvious). If the service is in “STARTING” mode, this will return “PENDING”.

sudo serveradmin fullstatus caching | grep "CacheStatus"

This should return “OK” if the cache status is healthy. I’ve tried to break this to get it to return something other than OK but I haven’t been successful. Even deleting the entire /Library/Server/Caching directory doesn’t cause this to fail.

sudo serveradmin fullstatus caching | grep "CacheFree"

Theoretically Caching Server 2 should never let this dip down to anywhere near zero, but doesn’t mean you can’t monitor it.

sudo serveradmin fullstatus caching | grep "RegistrationStatus"

Typically this only equals 0 when Caching Server 2 has been started for the first time. While 0 (zero), the caching server is talking to Apple to get a GUID and register itself. This process generally takes no longer than two minutes, and will change to a 1 (one) once it has completed registration.

defaults read /Library/Server/Caching/Config/Config.plist LastRegOrFlush

This will tell you the last time Caching Server 2 checked in with Apple and retrieved an updated list of peers (and their status).

Finally, there’s a great debug log that is really verbose in what is happening during any stage of Caching Server’s life. The location of the log is /Library/Server/Caching/Logs/Debug.log, so tail -f it when you’re playing around to see what it does.

Hopefully this article has helped you get familiar with Caching Server 2 and set it up correctly.

1 2 3 12 13 14 15